
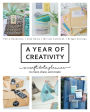

A Year of Creativity: A Craft Date Planner to Meet, Share, and Create
144
A Year of Creativity: A Craft Date Planner to Meet, Share, and Create
144Paperback
-
PICK UP IN STORECheck Availability at Nearby Stores
Available within 2 business hours
Related collections and offers
Overview
- An introduction to craft dates and how they work
- Tips on planning your craft date events
- Plenty of project ideas (short, long, and cooperative)
- Plus recipes for party dishes that keep the creative juices flowing

Product Details
| ISBN-13: | 9781631598173 |
|---|---|
| Publisher: | Quarry Books |
| Publication date: | 07/23/2019 |
| Pages: | 144 |
| Product dimensions: | 8.05(w) x 9.95(h) x 0.65(d) |
About the Author
Craftiness is happiness for Lidy Nooij. She has been creating for her entire life. When she was twelve, she got her first sewing machine and started sewing clothes for her dolls, decorated jars with embroidered bits of felt, and made perfume from rose petals. At school, she organized crafting afternoons with friends for other kids. Lidy's crafting is multi-faceted and focuses on many techniques and she is always learning new ones. Over the years, she has participated in a variety of workshops on things including crocheting, leather tanning, lace making, painting, quilting, and dressmaking. Petra is self-taught, and enjoys the process most of all. For the past few years, she has been a member of the Craft Kitchen team. Together with other Craft Kitchen ladies, she attends conferences and blogs at www.craftkitchen.nl. Instagram: lidynooij Blog: lidynooij.com
Miriam Catshoek started to sew her own pants, knit simple sweaters, and alter clothes from a young age. In her house, you got your own sewing machine on your sixteenth birthday! She draws inspiration from the piles of fashion, interior design and styling magazines, and books she buys (for which she continues to have a weakness). She enjoys working with paper, stamps, and punches to make cards, cool labels, and packaging. Her style is basic and robust with nothing fiddly, no complicated patterns, just beautiful yarn in simple patterns in her favorite colors of grey, old rose, and green. Miriam usually has at least four projects going at once time. Instagram: miriamcatshoek
Bregje Konings has been crafting and fiddling around with cloth, thread, paper, and paint for as long as she can remember. Her passion is working with textiles. She got her first Singer sewing machine when she was eight years old and has not stopped since. Bregje trains teachers in the area of drawing and textile methods. She graduated from school in Holland with a focus in fashion and clothing. Her specialty is to make items that are reversible and can be worn inside out and feature subtlety in color, detail, and finishing. She almost never throws things away because anything can be used to make something! Instagram: bregjekonings Blog: needlesbybregje.blogspot.nl
Read an Excerpt
CHAPTER 1
MIRIAM'S CROCHET GLASS VASES
[Handmade)
WITH LOVE
You can never have too many containers ... I love them! I collected a whole bunch of square, glass vases at the thrift store. You can find them there in all sorts of sizes. Use chunky wool or rustic jute to crochet a sleeve for the container, a fun and simple project. Give everyone a plant to go in it and you're all set. I personally love doing this kind of project and really enjoy giving the finished project as a gift.
What follows is a pattern for a fairly tall container. For shorter containers, adjust the pattern yourself accordingly. Use a combination of the rows described below until you achieve the desired height.
Crochet a row of chain stitches and finish with a slip stitch. Measure your vase to see how long the circle needs to be. Be sure not to make it too loose!
Close every row with a slip stitch.
Row 1: Make 1 chain stitch and make 1 single crochet in every chain stitch.
Row 2: Make 2 chain stitches and make 1 half double crochet in every stitch.
Row 3: Make 1 chain stitch and make 1 single crochet in every stitch in the back loop.
Row 4: Repeat the row above.
Row 5: Make 2 chain stitches and make 1 half double crochet in every stitch.
Row 6: Repeat the row above.
Row 7: Make 3 chain stitches and make 1 double crochet in every stitch.
Row 8: Make 2 chain stitches and make 1 half double crochet in every stitch.
Row 9: Make 1 chain stitch and make 1 single crochet in every stitch in the back loop.
Row 10: Make 1 chain stitch and make 1 slip stitch in every stich.
Secure the loose yarn and slip the crochet sleeve on to the vase.
SUPPLIES
Square vase Borgo de'Pazzi Bulky (about 3.5 ounces [100 g] for a large square vase) Hoooked Natural Jute (optional) Crochet hook N/P-15 (10 mm) Darning needle
SUPPLIES FOR LABEL
Sturdy Kraft paper/cardboard Craft Dates die cutting template or pinking shears Craft Dates stamp and stamp ink Fabric hole punch Robust yarn or thin string Green version is from Natural Jute (Hoooked)
LABEL
To finish off your project perfectly, add a sewn-on label to your crochet sleeve. Punch (Craft Date die cutting template COL1445) a label out of sturdy cardstock or cut out a 2.25 x 1.75 inch (5.5 x 4.5 cm) label using pinking shears. Stamp a cute image or text on to the label.
Punch holes on the sides using the hole punch and fasten your label to the sleeve with string or strong cotton yarn. Your container is now ready for use. Fill it with a cool plant, a nice bouquet of flowers, or your collection of crochet hooks.
Enjoy your hip, Craft Dates crochet vase!
PACKAGING INSPIRATION
Put all of the balls of Bulky yarn and some Natural Jute, if you are using it, in a large basket and place it in the middle of the table.
Set out the glass vases across the table and place a paper bag, decorated with patterned paper, stamps, and punched out figures, next to each vase.
These bags shown contain the (succulent) plants and a few prepunched labels that can be sewn on to the crochet sleeve later.
BREGJE'S PATTERN WEIGHTS
THEY KEEP YOUR DRAWING PAPER IN PLACE WHEN YOU'RE TRACING A PATTERN
SUPPLIES
Scraps of cotton or linen fabric Scissors Craft Dates stamps or rubber stamps Waterproof stamp ink (StazOn)
Aquarium gravel for the filling, preferably not sand Pins Needle and thread
Pattern weights are little bags filled with a weighted filling. They keep the pattern drawing paper nicely in its place when you're tracing a pattern from the original. Place a few here and there on your drawing paper so that it will stay put when you're tracing. They are super handy to have!
Cut the fabric scraps into 2.75 x 4.75 inch (7 x 12 cm) rectangles. This includes a 0.5 inch (1 cm) seam.
Stamp a small motif exactly in the middle of the square. It can be landscape or portrait orientation; it does not matter. Let the stamp dry.
Fold the rectangle, good-side facing inward, into a 2.5 x 2.75 inch (6 x 7 cm) square. Sew the side opposite to the fold closed. Sew one of the sides closed as well. You now have a small bag. Turn the bag.
Fold the open side over to create a 0.5 inch (1 cm) seam inward and smooth it out using your nail. This makes it a bit easier to pin it shut after you have filled it.
Fill the bag with a bit of gravel, just short of full. You'll need to twist it to sew the last seam closed to give the bag its pyramid shape.
Fold the open seam shut in such a way that it is perpendicular to the bottom — not parallel to the bottom, which will create a straight bag, not a pyramid. The pinned side seam is now in the middle on the back of the weight.
Pin the top with the previously folded 0.5 inch (1 cm) seam shut and sew the upper edge with small stiches, by hand, to close it.
Use this method to make as many weights as you'd like. Six of them will do a good job of holding a pattern in its place while cutting it out.
PACKAGING INSPIRATION
SUPPLIES
Kraft paper take-out containers (packaging materials)
Double-sided tape Small plastic bags Craft Dates die cutting template Cardstock Craft Dates stamp and stamp ink Twine or kitchen string White acrylic paint or chalk markers Sticker Black labels Wax stamp, sealing wax
Find nice fabrics for each person. Cut all of the fabric to size. Using double-sided tape, neatly stick the fabric rectangles to a piece of cardboard in layers.
Fill small plastic bags with the gravel filling.
Punch or cut out a piece of cardstock to use as a needle book, fold in in half, and affix a piece of fabric, or not, to the inside in which to stick needles and pins (see page 39). Stamp a sewing machine or some other appropriate image on it.
Punch a small card on which to wrap thread in colors that match the fabrics. Put all of these items, along with the printed-out instructions in an envelope, in the take-out container. Wrap the container in twine and hang a small label on the twine with a sticker on which you write the name of the recipient. Write a lovely quote on the black label using white chalk marker and hang this on the box as well.
Finally, heat a small amount of the black sealing wax until it is fluid and pour this on to the closure on the lid of the box. Stamp the melted sealing wax with a nice wax stamp.
THIS IS HOW WE CROCHET A BLANKET
It's fun to plan a Craft Date where everyone works together on a single project — a lovely granny blanket for a mutual friend whose birthday is coming up, for example.
AFFORDABLE GRANNY BLANKETS BY FOUR LADIES
Of course, it's always nice to work with beautiful, natural yarn — it's what we prefer — but when you want to make a bigger project, it can end up being very expensive. Thankfully, these days, there are a variety of acrylic yarns available that are machine washable and still feel soft. Bravo from Schachenmayr is an example of this kind of yarn that we like to work with, and it's available in an array of lovely colors. For this blanket, we each designed our own granny square. These squares can also be used for other projects.
SUPPLIES
Bravo, 4 different colors, 5 balls of each Bravo, 1 joining color, 8 balls Crochet hook 7 (4.5 mm)
The instructions for making the four different granny squares and for putting the blanket together can be found on pages 128–131.
MIRIAM'S INSPIRATION BOARD
Paint the wooden board, as well as the cork coaster, using matte paint, in different colors, if you'd like. Decide on what you want to include on your inspiration board and organize it in a way that makes sense to you.
It's easiest to affix the coaster first by gluing it to the board. Cut your measuring tape to size and attach it to the board with tacks. Measure the things you want to insert behind the measuring tape (cards or pictures, for example) so that you can space out the tacks accordingly. Make a loop using the remaining measuring tape and attach the loop to the board with a tack. You can use the loop to hang yarn samples, among other things. Have a good look again at where you want to hang everything and attach the binder clip, hook, and screw eye/metal ring in the corresponding places.
A small screw should fit exactly through the hole in the binder clip. Use the bradawl to make a hole in the wood and screw the binder clips to the board.
Now the "styling" of your board can begin. Pin cards that you like and pictures, etc. to your board. Hang your nicest scissors on the hook and make paper labels around which to wrap your favorite color combinations of yarns. You can hang these labels on the metal ring. It's always handy to be able to bring your best colors with you to stores or to Craft Dates.
Hang up your inspiration board in a good place in your craft room, hobby room, or studio or prop it up on a shelf where you can enjoy it fully!
SUPPLIES
1 wooden board, 15.75 x 17.75 inches (40 x 45 cm)
Bradawl Large cork placemat (from IKEA or Albert Heijn)
Matte paint (Dekor Paint Soft from Pentart), paint brush Good glue (HT2 Gütermann Creativ)
Nice measuring tape to cut to size Screw-in hook, screw eye, tacks, screws Metal ring, binder clip Nice scissors Screwdriver, hammer
TIP
Using a softer type of wood makes it easier to insert the screws and tacks.
PACKAGING INSPIRATION
Cover the table with a nice-looking vinyl table covering and place the wooden boards on top. On each board, place a nice, transparent, bag with a small piece of pretty wallpaper inside with "Craft Date" stamped on to it. Place all of the materials you'll need into this bag. In the middle of the table, place a rustic crate that contains all of the paints and brushes. Everyone should also get a small glass pot for a bit of water.
FOUR "ITALIAN" SCARVES
LINEN WITH A CROCHET EDGE
These "Italian" scarves get their name from the Italian origin of the linens used and the yarn.
Crochet Goodness
All the instructions for making these beautiful scarves can be found on pages 137–139.
LIDY'S CANADIAN APPLE PIE
A Craft Date isn't complete without treats. Chatting, crafting, and treats! That's the foundation of any successful Craft Date. But many creative-types don't like spending too long in the kitchen. This apple pie is delicious and is super easy and quick to make. I'm a big fan!
INGREDIENTS (serves about 8)
4 apples
14 tablespoons (13/4 sticks, or 200 g)
butter
21/4 cups (250 g) self-rising cake flour
11/4 cups (100 g) oatmeal
1 cup (225 g) brown sugar Nuts (optional)
EQUIPMENT
8 x 2" (20 x 5 cm) springform pan Parchment paper
TIP
If you have a Craft Date planned for a big group of people, just double this recipe and make the pie in a sheet pan, spreading the dough out across the entire pan.
DIRECTIONS
Wash the apples well.
Finely chop the apples, leaving the skin on.
Melt the butter in a small saucepan or in the microwave (do not overheat it).
Combine the self-rising flour, oatmeal, and brown sugar fully in a large bowl. Add the melted butter and stir well.
Preheat the oven to 350°F (180°C, or gas mark 4).
Line the springform pan with parchment paper. S pread 3/4 of the dough across the bottom of the pan and the sides, pressing it down firmly. Top the dough with the apple pieces, sprinkle the apple with a bit of cinnamon, and crumble the remaining dough over the top.
Bake the apple pie in a preheated oven for about an hour.
Bon appétit!
MIRIAM'S TOOL STATIONS
PRETTY AND USEFUL ADDITIONS TO YOUR CRAFT DATES TABLE
Here's a handy and fun tool station for the table during a Craft Date or even handier for your own craft table! I prefer not to have a bunch of loose items lying around on my work surface. If you're working on something creative with a group of people, your table will end up covered in materials and tools pretty quickly. That's what makes this handy tool station so great — it keeps all your tools in one place and looks great next to a vase of fresh flowers.
METHOD
Paint your tray in a color of your choosing and allow it to dry fully. Crochet a sleeve for the large jar (using the pattern for the square glass vases, for example).
Stick a piece of Aslan self-adhesive film to the back of your paper. Punch or cut out a nice label from your paper.
Add a nice stamp to your label or write something on it. Carefully remove the backing on the Aslan self-adhesive film and stick the label on your (fully degreased) small glass jar.
This is how you make the pincushion: fold your fabric in half with the reverse sides together and sew three sides. Leave one side open a bit so that you can turn it right-side out. You can also stitch in a label or a ribbon loop there. Turn your pincushion right-side out, stuff it with filling, and sew the opening closed by hand. Stick a few colorful pins into it and you're done!
Place crochet hooks, scissors, or markers in the large, crochet jar and place stitch markers, stitch rippers, threads, or flowers in the small one.
There are so many options and makes such a great gift to give!
SUPPLIES
A simple, wooden candle tray or small serving tray Matte paint, Dekor Paint Soft from Pentart, for example, and paintbrush Empty, clean, glass (jam) jars Cotton crochet yarn, Durable Double Four Crochet hook Darning needle Aslan self-adhesive film (to make stickers)
Nice paper Craft Date stamps and stamp ink Fabric, about 6 x 11.75 inches (15 x 30 cm)
Sewing thread and a sewing machine Ribbon for labels Filling for pincushion Pins
TIP
Matching the colors of all the elements of your tool station yields the best result. Try to pick paint, fabric, paper, and yarn colors that are complementary.
LIDY'S HABERDASHERY BAG AND NEEDLE BOOK
SUPPLIES FOR THE HABERDASHERY BAG
Unbleached cotton, 2 pieces, 7.5 x 6 inches (19 x 15 cm) each Craft Date stamps and-stamp ink Piece of twill tape or ribbon Pins Needle and thread or sewing machine Iron Binder clip Craft Dates paper Craft Date die cutting templates Notebook Pencil
SUPPLIES FOR THE NEEDLE BOOK
Sturdy (Craft Dates) paper Craft Date Stamps and stamp ink Felt Hand-binding stapler Sewing needles and pins
Punch or cut out a 3.5 x 2.5 inch (9 x 6.5 cm) rectangle out of the paper, fold it in half, and stamp something cute on the front. Punch or cut (using pinking shears) a 2 x 1.5 inch (5 x 3.5 cm) piece of felt. Affix the felt to the inside of the card using a staple. Insert the needles and pins into the felt. Done! The needle book can now go in the haberdashery bag.
This is a great option for neatly packaging up all the notions and items (the haberdashery) you'll need for a Craft Date.
Make a bag from two pieces (7.5 x 6 inches [19 x 15 cm]) of unbleached cotton. Stamp and fold a piece of twill tape or ribbon and pin this between the two pieces of fabric as a label.
Sew the two pieces together on three sides, trim the corners, and turn the bag right-side out. Iron the bag flat and leave the opening unfinished.
Stamp the word haberdashery (using the Craft Dates stamp) on to the bag.
Fill the bag with whatever notions you'll need (for example, a tape measure with a stamped round sticker stuck on to it, a self-made needle book, and stitch markers).
Fold the top of the bag over to close, hold the fold in place with a binder clip, and tuck a few labels (made with Craft Dates paper and a Craft Dates die cutting template) under the clip, as well.
Buy a notebook and pencil and stamp some appropriate text on to in.
This makes a nice, stylish set to house supplies and it is a real gift for your guests.
(Continues…)
Excerpted from "A Year of Creativity"
by .
Copyright © 2019 Quarto Publishing Group USA Inc..
Excerpted by permission of The Quarto Group.
All rights reserved. No part of this excerpt may be reproduced or reprinted without permission in writing from the publisher.
Excerpts are provided by Dial-A-Book Inc. solely for the personal use of visitors to this web site.
Table of Contents
Introduction 7
Foreword 8
The Authors 10
How it All Began 13
How Does a Craft Date Work? 14
Craft Dates-Styling 40
Craft Dates-Materials 140
Our Favorites 142
Sponsors 143
Recipes
Lidy's Canadian Apple Pie 34
Miriam's Quick Soup 54
Petra's Salad with Candied Walnuts and Raspberries 82
Petra's Chic Sandwiches 84
Bregje's Quark Tart 108
Techniques
This is How We Crochet a Blanket 128
Green Yarn 132
Italian Scarves 137
Projects
Short projects
Longer projects
Weekend or cooperative projects
Miriam's Crochet Glass Vases 18
Bregje's Pattern Weights 22
This Is How We Crochet a Blanket 26
Miriam's Inspiration Board 28
Four "Italian" Scarves 32
Miriam's Tool Stations 36
Lidy's Haberdashery Bag and Needle Book 38
Petra's Crochet Basket 41
Lidy's Coat Rack 46
Miriam's Placemats 50
Bregje's XL infinity Scarf with a Twist 56
Petra's Hurricane Lights 60
Lidy's Craft Dates Inspiration Book 63
Green Yarn 66
Lidy's Crochet Bag 70
Lidy's Slow-Stitch Wall Hanger 77
Miriam's Jute Bottle Hanger 86
Bregje's Apron 90
Lidy's Knit Garland 96
Miriam's Crochet Scarf 100
Bregje's Craft Cards 104
Petra's Oilskin Project Bag 110
Petra's Project Bag with Imprint 115
Dying Yarn 118
Lidy's Pencil Case 124