
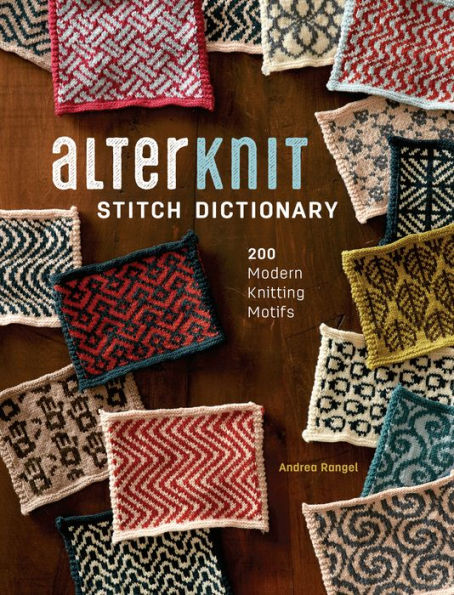
AlterKnit Stitch Dictionary takes an unexpected look at stranded colorwork with 200 new motifs. These unique colorwork charts are perfect for the creative knitter looking to break away from the ordinary. Derived from graphic design elements, these fresh, fun motifs include everything from geometric mountains, waves, and spirals to modern bikes, skulls, and sheep.
Dive into color knitting with confidence with a section on reading charts, working floats, and choosing colors. Learn how stranded colorwork can be used in design with five accompanying projects including mitts, cowls, and sweaters. AlterKnit Stitch Dictionary is the perfect gift for knitters looking for fun pattern ideas or new stitches. Get inspired to break the rules and use your imagination to modify, deconstruct, and combine motifs to create your own unique designs.

Hardcover
-
SHIP THIS ITEMIn stock. Ships in 1-2 days.PICK UP IN STORE
Your local store may have stock of this item.
Available within 2 business hours
Related collections and offers
Overview
AlterKnit Stitch Dictionary takes an unexpected look at stranded colorwork with 200 new motifs. These unique colorwork charts are perfect for the creative knitter looking to break away from the ordinary. Derived from graphic design elements, these fresh, fun motifs include everything from geometric mountains, waves, and spirals to modern bikes, skulls, and sheep.
Dive into color knitting with confidence with a section on reading charts, working floats, and choosing colors. Learn how stranded colorwork can be used in design with five accompanying projects including mitts, cowls, and sweaters. AlterKnit Stitch Dictionary is the perfect gift for knitters looking for fun pattern ideas or new stitches. Get inspired to break the rules and use your imagination to modify, deconstruct, and combine motifs to create your own unique designs.

Product Details
| ISBN-13: | 9781632505538 |
|---|---|
| Publisher: | Penguin Publishing Group |
| Publication date: | 08/10/2017 |
| Pages: | 168 |
| Product dimensions: | 8.10(w) x 10.10(h) x 0.70(d) |
About the Author
Read an Excerpt
CHAPTER 1
CHOOSING YARNS & COLORS
Yarns
You can work stranded colorwork with most kinds of yarn, but you'll probably want to start out with a wooly, tweedy, woolen-spun yarn. Blocking these kinds of yarns causes the stitches to bloom and settle into each other, making a cohesive fabric that shows the color patterns and softens most uneven tension. Smoother, worsted-spun yarns are crisp and clear, but make uneven stitches show up more distinctly. The swatches in this book were created with a gorgeous round worsted-spun yarn, Quince and Co. Finch. It makes for bright, clear swatches with high contrast, which was my main goal for this book, but keeping those stitches even took a bit more effort than it would have if I had used a woollier yarn.
Fibers such as alpaca, silk, and cotton really show off any inconsistencies in stitches because they have little or no memory (they're not bouncy), and the fabric will be quite heavy due to the thickness of colorwork. They can also grow out of shape over time, since they're so slippery.
Colors
Deciding which colors you like together is deeply personal, and a big part of creativity in knitting. My suggestions on choosing colors aren't rules, but rather tools that you can use when you're applying your own creative power. Colors can be an expression of your mood, your personality, your style, or just where you're at in your life. It's important that you use colors that inspire you, but not all color combinations will work equally well. Most of the time using colors that contrast strongly with each other will look best, because it will make the color pattern stand out clearly. So how can you tell which colors will contrast with each other?
Hue
Hue is defined by the position on the visible color spectrum. It's what we mean when we say, "What's your favorite color?" — blue, red, green, and the others. Hues that are on opposite sides of the color wheel from each other tend to contrast well, such as red and green. But hue isn't the most important thing to keep in mind when choosing yarn colors.
Value
Value is the relative lightness or darkness of colors. Even if you choose colors that are on opposite sides of the color wheel, if they're relatively the same value, the pattern you create using them can have a tendency to look muddy and unclear. You're more likely to get a clear and pleasing combination by choosing colors that are different values, even more effective than when you use those with different hues. After all, a dark and light blue can contrast beautifully! A great trick to help you determine if colors are sufficiently different in value is to take a black-and-white photo of the yarn combination. Once the hue is removed you'll be able to tell how light or dark each color is in comparison to the one next to it. If one isn't considerably lighter than the other, they're probably too close in value and won't contrast well.
Swatch
The only way to know for sure if you like your color combination for the particular pattern you're working on is to knit with it. I love swatching with different color combinations until I find the best one for the job. I also recommend inverting the colors — having a light pattern over a dark background or vice versa can make a striking difference in the feel of your fabric, and it's worth experimenting with which you prefer.
CHAPTER 2
HOW TO HOLD THE YARN
There are several ways to hold your yarn when knitting with two colors. I encourage you to try them all to find out which you prefer (this is my general knitting philosophy!), but it's very important that no matter which you choose, you're consistent. Work in the same way for a whole project (including your swatch, which you definitely will be making and blocking and measuring, of course, because you always do, right?), and be sure to hold the colors in the same orientation throughout. That'll be covered more when we talk about color dominance in the next section, but remember that consistency will make your project more beautiful.
Holding One Color in Each Hand
My favorite method for working stranded colorwork is the two-fi sted method. I hold a strand of yarn in each hand and then use picking to work the stitches in my left hand (also known as Continental knitting) and throwing to work the stitches in my right (English knitting). With this method, it's easy to get into a rhythm following the chart, I don't have to look at my knitting in order to know which color I'm using, and I can consistently keep one ball of yarn on my left and one on my right. Here's what that looks like:
Holding Both Colors in the Same Hand
Most knitters are primarily pickers or throwers, so using both hands at the same time can take practice. If you prefer, you can hold both colors in the same hand, but a major drawback of doing so is that, if your pattern doesn't have about the same number of stitches in each color, or if you have long sections of one color, you'll have to drop your yarn to reestablish proper tension more frequently than you would if you worked the colors independently — one in each hand. That being said, you do you! Lots of knitters happily and successfully hold both strands in one hand, and here's how:
Left Hand (Continental/Picking)
When holding both strands in your left hand, you'll pick all stitches of both colors. Be careful to keep the dominant color to the left of the background color as you work. In this orientation, the background color will be the one closer to the tip of your index finger:
Right Hand (English/Throwing)
You can also hold both strands in your right hand, throwing all the stitches of both colors, and being sure that the dominant color is held to the left of the background color.
CHAPTER 3
FLOATS
A float is the strand of yarn that's not currently being knit into stitches, but is instead being carried along loosely behind the work. The length of the float is determined by how many stitches of the working color there are before you switch back to the other color. For example, if a chart calls for knitting 5 stitches of color A, then 3 of color B, the first float will be 5 stitches long (color B is being stranded behind the work as color A is knitted), and the second float will be 3 stitches long (color A is being stranded behind the work as color B is knitted). You may have heard that long floats can be problematic and should always be avoided.
This isn't necessarily true, but long floats do have consequences and need to be addressed.
What counts as a long float is subjective and knitters will disagree: 3 stitches is definitely not a long float, but any more than 5 might be considered long, depending on who you're talking to.
If a float is very long, a couple of negative things can occur. First, your fabric can become distorted. As a float gets longer, it can be difficult to maintain the right length of the float in relation to the rest of the fabric. If it's too short, the fabric will bunch up in front of it. If it's too long, the stitches that occur before and after the float are likely to be very loose. Either way, your fabric can end up puckered and uneven.
Another possible problem is that fingers and jewelry can get caught in long floats of sleeve cuffs or mittens, which is annoying and can also result in broken yarn inside your garment. (Colorwork that's just at the yoke or around the bust of a sweater or on a cowl can be more manageable because that part of the garment or accessory doesn't have a narrow tube that your hand has to squeeze through.)
So what to do if long floats cause problems? The answer is to catch the floats (otherwise known as weaving, trapping, or locking) as you go. Catching a float attaches the strand to the back of your fabric, effectively shortening the length that could get caught on things, preventing long, open strands from occurring across the back of the fabric, and assisting you in maintaining your tension.
The most common tactic for doing this is to catch the floats periodically. Some knitters call for floats to be caught every fifth stitch or every eleventh, or some other very specific number. Personally, I usually just catch them when it seems necessary, probably about every inch or so. Be sure not to catch the float in the same place every round, though. Having a caught stitch directly above another one can make an obvious weirdness on the front of your fabric, so it's best to alternate where you do the catching.
In the case of very long floats, it can be beneficial to catch the float every other stitch, rather than just periodically. This has the benefit of creating a consistent look over your whole fabric. It will look different than regular stranded colorwork, but consistently catching floats every other stitch is a great solution if a pattern has multiple very long float sections, rather than just 1 or 2 rows that include long floats. This technique is often used in traditional Cowichan knitting. Again, it's best to alternate where you catch the floats, so if you caught the first, third, fifth, and so on in Round 1, catch the second, fourth, sixth, etc., in Round 2. This isn't a hard-and-fast rule, just a guideline. One other thing to keep in mind about this method is that it creates a more dense, less draping fabric, so be aware of that as you plan your project.
While catching floats is a great solution for dealing with long floats, it's not without its problems. Caught floats can be visible on the front of the fabric. When you catch a float, one stitch at the spot where you caught it can be unusually tight while the stitches next to it have a tendency to be extra loose. You can fix this problem by manually tugging on the legs of the tight stitch in order to move some of the yarn from the looser stitches into the tight one, thus evening out the tension. That is a bit laborious, so I recommend testing out different rates of catching floats (or not catching them at all) while swatching to help you decide how you want to do it in your project. Remember, what matters is how you feel about your work.
CHAPTER 4
COLOR DOMINANCE
In the section on how to hold your yarn, I mentioned that it's important to be consistent about the position of each color of yarn throughout your project. Here's why. When stranding two colors, one of them will physically fall below the other one as you work. The color below ends up with more yarn than the one that's stranded above, making the stitches in that color larger and causing them to visually pop more than the stitches made with the color that's stranded above.
The color that strands below is called dominant because it stands out more in the finished fabric. In order to get clean, clear colorwork, it's important to be consistent and always hold the same color dominant throughout your work, regardless of how you hold your yarn. It makes a subtle but definite difference in the look of the finished fabric.
So which color should be dominant? This can be subjective depending on the pattern, but generally, whichever color creates the pattern should be held dominant, while the color that forms the background should be held nondominant. The Argus swatches show how dominance can make a difference. The swatch on the left has the dark color held dominant and the swatch on the right has the light color held dominant. Notice how the light color slightly retreats in the swatch on the left.
CHAPTER 5
HOW TO READ CHARTS
When you're reading a chart, the first thing to know is that every box represents a stitch in a given color. The chart is a representation of one repeat of the color pattern with additional boxes possibly to the left, right, top, and/or bottom of the repeat to show symmetry. When it says, "rep of 12+1" that means that the repeat is 12 stitches, but you'll need to add one stitch at the beginning or end if you want it to be symmetrical.
Color charts may sometimes include colors and symbols. If you see symbols, they're there to help you distinguish between the colors when working from a black-and-white copy, or to help make them more obviously different.
Always start working color charts with the bottom right square. This square represents the first stitch on a RS row. Most of the time, you'll be working stranded colorwork in the round. That means every round is worked on the RS and none on the WS. When that's the case (working in the round), read every round from right to left.
If you happen to be working back and forth in rows, read the RS rows from right to left and the WS rows from left to right. This is more commonly used with lace, cables, and textured stitch pattern charts than with stranded colorwork.
If you see a bold box around some of the squares in the chart, that means that stitches and/ or rows before or after the pattern repeat are there to create pattern symmetry (making the pattern a mirror image either horizontally or vertically.) That's shown in the example chart as a 12-stitch/12-row pattern repeat. If there is no bold box, that means that either the stitch pattern is already symmetrical or that it doesn't lend itself to symmetry, and the whole chart is the pattern repeat.
To work from the chart, start at the bottom right square. If a bold box is present, work to the end of the box, then start over at the beginning of the bold box again in the same row. After the last repeat of the bold box, just work to the end of the chart (the far left square in Row 1.) If there is no bold box, just repeat the whole chart from right to left to the end of the row. Then work Row 2 and subsequent rows in the same way. Charts can be repeated vertically as well. So when you finish the rows shown on the chart, you'll begin again with Row 1 (or the first row of the bold box) for an allover pattern. If there's a row above the bold box, it's there to show you how to make your pattern symmetrical vertically so that the top is the same as the bottom. Not all charts lend themselves to symmetry, though, so it won't always be present.
SWATCHING
Most stranded colorwork is worked in the round, so it's important to swatch in the round, too, in order to get accurate information from your swatch. Here are a couple of methods for swatching in the round:
Leave Long Strands at the Back of Your Swatch
Use a circular needle and CO about 6" (15 cm) worth of stitches on the needle you hope to use for your project. Work a few rows in single-color stockinette or garter stitch to get things established (working back and forth in rows). Then knit your first color pattern row. Instead of turning your work to the wrong side to purl, slide the stitches back to the other end of the needle so that they're positioned to begin working another RS row. Leaving strands of both color yarns loose across the back (the length of these strands should be about the width of the swatch), work Row 2 of your pattern, again on the right side. Repeat this until you've got about a 6" (15 cm) square of fabric. Then work a few rows in single-color stockinette or garter and bind off. You can then cut through the middle of the long strands and trim them, leaving the strands about 1" (2.5 cm) long so that the swatch lies flat. This method is great because it can give you a fairly accurate gauge measurement without you needing to knit an enormous swatch. The disadvantages are that the edge stitches can be very loose and that can be awkward as you work. It also means you need to make a swatch big enough that those wonky edge stitches won't interfere with the center of the swatch, where you'll measure your gauge.
Work Your Swatch Like a Sock, but with a Steek
With double-pointed needles, a long circular needle for magic loop, or two circular needles, cast on about 6" (15 cm) worth of stitches, then add 3–5 extra (steek) stitches at the end of your round. Place a marker and join for working in the round. Work a few rounds of single-color stockinette or garter, then work Round 1 of your color pattern, ending the round with your steek stitches — knit them by alternating colors every stitch. Then continue in this manner until you've worked about 6" (15 cm). Work a few more rounds of single-color stockinette or garter and bind off. You may wish to change the position of the needles every few rounds to avoid laddering at the separation points. After binding off, cut through the center of your center steek stitch, then block. If you want some practice reinforcing the steek, this is a great place to do it (see the next section for more info on steeks.) If you've got that down, though, there's really no need to reinforce, since it's just a swatch and won't be worn. I always just cut my swatches! I prefer swatching this way because I find it more natural and less cumbersome than leaving long strands along the back. However, some knitters actually work more tightly on small circumferences than on large ones because you have to fuss with multiple needles, and that finickiness can cause gauge to tighten up. You'll have to experiment to find out your own knitting style and whether this method is reliable for you.
Whichever method you choose, be sure to wet-block your swatch before evaluating it. Pinning your swatch about every half inch will help it to dry flat without scalloping edges. (If your edges aren't straight, use more pins!)
(Continues…)
Excerpted from "Alter Knit"
by .
Copyright © 2017 Andrea Rangel.
Excerpted by permission of F+W Media, Inc..
All rights reserved. No part of this excerpt may be reproduced or reprinted without permission in writing from the publisher.
Excerpts are provided by Dial-A-Book Inc. solely for the personal use of visitors to this web site.
Table of Contents
INTRODUCTION, 4,
CHOOSING YARNS & COLORS, 6,
HOW TO HOLD THE YARN, 8,
FLOATS, 10,
COLOR DOMINANCE, 15,
HOW TO READ CHARTS, 16,
SWATCHING, 17,
STEEKS, 18,
TIPS FOR BETTER COLORWORK, 20,
1 SWATCHES, 23,
2 PROJECTS, 124,
USING STITCH MOTIFS IN PROJECTS & DESIGNS,
BIKEY BEANIE, 132,
DEEP OCEAN MITTENS, 136,
HELIX COWL, 140,
SKULL AND BONES PULLOVER, 144,
LEAVES IN WATER CARDIGAN, 150,
ABBREVIATIONS, 162,
SWATCHES BY STITCH AND ROW COUNTS, 162,