


Paperback
-
PICK UP IN STORECheck Availability at Nearby Stores
Available within 2 business hours
Related collections and offers
Overview
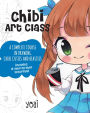
Chibi is Japanese slang for “short,” and chibis are mini versions of Japanese anime and manga characters defined by their large heads and tiny bodies, both of which contribute to their kawaii, or cuteness, factor. Now, you too can learn to draw these adorable doll-like characters.
Here, you'll learn how to create chibis’ signature bodies, facial features, and props, including dreamy eyes, fun clothes and shoes, vibrant hair, colorful accessories, and lively backgrounds. You'll also learn how to color and shade your vertically challenged characters for optimal cuteness.
This book also features:
- 19 tutorials with simple step-by-step illustrations and instructions for drawing chibis, including a chibi character for every month of the year as well as adorable chibi beasties
- An inspiration gallery with ideas for eyes, hairstyles, clothing, props and accessories, and ears and tails
- Blank body bases for you to start your own chibi drawings
- Uncolored chibis for practicing coloring and shading
Thanks to this crash course, soon you will be enhancing your notebooks, stationery, artwork, and more with your own unique chibi world. Chibi Art Class is now in session!
Learn even more fun drawing techniques from Yoai with:Mini Chibi Art Class, Anime Art Class, Anime Art Class Sketchbook, and Anime + Chibi Art Class.

Product Details
| ISBN-13: | 9781631065835 |
|---|---|
| Publisher: | WellFleet Press |
| Publication date: | 04/02/2019 |
| Series: | Cute and Cuddly Art Series , #1 |
| Pages: | 144 |
| Sales rank: | 485,343 |
| Product dimensions: | 8.00(w) x 9.90(h) x 0.65(d) |
About the Author
Read an Excerpt
CHAPTER 1
Sketching Your Chibis
Before you begin drawing and coloring your chibis, you should do rough sketches of them first — ink is permanent, but pencil can always be erased! A good sketch makes for a great foundation for your drawings.
BODIES
Unlike regular Japanese anime and manga characters, chibi characters do not have realistic proportions, having more in common with cartoon characters in terms of size and shape, with their large heads and tiny bodies. In this section, I will show you how to draw the proportions and body types for your chibis.
components
As you will see with my illustrations throughout this book, the components that make up a chibi's body are simple to draw and usually consist of a large oval head, small trapezoid-shape torso, simple arms and legs (and hands and feet!), thin neck, and arcs off the sides of the head for ears. Once you have this simple base down, you can then play with their proportions, poses, and looks. There's no limit to what you can do with chibis!
proportions
A good rule of thumb when drawing a chibi is that the body should be roughly the same length as the head. Use the head of the chibi as a unit of measurement when planning out the proportions of your character, like I've done here. This chibi is two "heads" tall, with the body being the same length as the head.
Body Types
When drawing the torso and limbs, there are many different body types to choose from. Here are the four that I use most often.
FACIAL FEATURES
The face is, no doubt, the first thing that draws your eyes to a chibi drawing (no pun intended!). In this section, I will show you how to place facial features, along with tips on showing expression through the features.
Proportions and Placement
As with the method used to make proportional these guidelines, work from the outside in. It also checkpoints for the body (page 15), the same rules helps to draw a vertical line down the center of can be applied to positioning features on a face, the face to establish where the nose will go. If the including the start of the hairline, eyebrows, base of character is facing to the right or left, then the vertical the eyes and nose, mouth, and chin. When adding line should be slightly to the left or right of center.
Eyes
The eyes can be one of the hardest things to draw on the face, and yet the most important. A good tip to remember is that the distance between the eyes should be the width of one eye. For a straight-on view, the eyes should be the same size; on a tilted face, the iris of the eye farther away from view should be about half the width of the nearer eye, and even smaller, the farther the head is tilted to the side. See the Inspiration Gallery on page 126 for lots of cool eye styles!
Perspective also affects the shape of the eye. For a straight-on view, there is no dramatic shifting of the iris within the eye. If the viewing angle is from the bottom, the iris will shift lower on the eye, exposing the white of the eye to the top of the iris. The opposite is true if the viewing angle is from the top.
Eyes might just appear to be simple circles, but there are actually a lot of components to them, with many ways to draw them. Japanese anime and manga eyes resemble realistic eyes, but with some features exaggerated or removed. Here is a comparison of a (somewhat) realistic eye and an anime eye. The most notable difference is the iris — the anime one is huge! The entire eye itself is narrow and vertically long, and the corners and tear ducts are nowhere to be seen. The eyelashes are more defined and clumped together, and the eyebrow is simplified. There is also a large distance between the brow and the eyelid.
There are also a few differences between an anime eye and a chibi eye. Chibi eyes should ideally be longer, have larger irises, and smaller eyebrows to add to the cuteness factor.
The shape of the eyelids can cover different amounts of the eye and also affect the expression. When drawing eyelids, the fold should appear as a crease above the lash line; it can either go along the whole length or just start at the inner corner of the lash line. If eyes are half open, the crease can be drawn lighter for a more realistic effect. Here are examples of different eyelid shapes, the arrows indicate which directions to draw the lash lines.
Eyebrows should always be drawn starting from the inner corners (from the nose) outward (to the sides of the head). Here are examples of different shapes for eyebrows.
Let's not forget the side view! The same rules apply when drawing an eye, but you want the general shape to be a flat side for the iris with a curved top and bottom for the top and bottom lids.
Noses
Here are a few examples of noses, though in some cases drawing a nose is unnecessary if you prefer to add in the contour of one when shading instead.
Mouths
When drawing the mouth, don't forget to add teeth or a tongue for a more realistic look, instead of just what appears to be an endless void through a hole in the middle of their face. The tongue should be a shade lighter than the inside of the cheek to add more depth. Don't forget to add a crease below the mouth for the bottom lip.
expressions
Certain features should not be left out if you want your character to be expressive. The most important ones to keep are the eyebrows and the mouth. Here are some examples of how changing the eyebrows or mouth can affect the expression and emotion of your chibi character.
HAIR
Just like our hair is an important way of expressing ourselves, hair for chibi characters does the same thing! Hair can be long or short, curly or straight, tied up or loose — anything you desire! Don't forget to check out the Inspiration Gallery on page 129 for hairstyle ideas.
Texture
In order to simplify the process of drawing hair strands, you can draw in the general shape of the hair first before adding in details. Make the strands vary in width; they will look more realistic and give the hair depth, rather than looking like a squiggly tube or ramen noodles.
When drawing hair, remember that not every strand is on the same plane, meaning there is hair in the front as well as the back. Because the hair in the back is farther away, you don't have to define individual strands. Also make it a darker shade than the hair in the front, as the light source is not going to be hitting it directly.
Technique
Have you ever wondered where to start when drawing hair? In order to prevent hair from looking like a cheap party wig that you slapped on your chibi, you should ensure that the hair is branching out from one or more points of the scalp. Here, the blue line serves as the hairline. This means that everything above this line is the scalp, where hair can "grow" and branch out from, and the area below this line is the head, where hair can fall over and overlap. Here are some different ways the hair can "grow" and branch out from your chibi's head.
CLOTHING
Clothes and shoes help give chibis their "character," but these things can also be a bit of a challenge to draw, since chibis have small bodies and tiny feet. Don't forget to check out the Inspiration Gallery on page 132 for fashion ideas.
Clothes
Even though chibis have small bodies, this doesn't mean their clothes have to be small too. Clothes can be drawn loose-fitting to make the chibis look bigger and to give the "fabric" flow. Doing this also helps balance the body with the large head.
Shoes
Chibi characters have tiny feet, so drawing shoes can be quite a challenge. There's hardly room to indicate where the toes are, much less figure out how to fit a shoe on a foot! Even though chibis' feet are small, the heel and toe can still be highlighted. Here, the heels and toes are marked in blue on a wide chibi foot and a thin one.
PROPS AND BACKGROUNDS
In order to bring your chibis to life, you can add some props and/or backgrounds for them to interact with. Here are some tips on how to suspend reality and make your chibi drawings more engaging. Don't forget to check out the Inspiration Gallery on page 135 for prop ideas.
Props
The chibi world doesn't have to shrink to match a chibi's size. When this cat is drawn in proportion to the character, it is kind of boring, right? But when the cat is bigger, there's some meaningful interaction!
Backgrounds
Another way to fill empty space is to add a background. You don't want your chibi to be all alone in an endless white void, do you? Like with props, the background doesn't have to be realistic — even a simple pattern will do.
This fishing scene is an example of a partial background, BackgroundsAnother way to fill empty space is to add a background. You don't want your chibi to be all alone in an endless white void, do you? Like with props, the background doesn't have to be realistic — even a simple pattern will do.
This fishing scene is an example of a partial background, with an interactive foreground. It is always a good idea to think of the full scenario before you begin sketching your chibi to ensure that the chibi's pose fits with the chosen environment.
You can even pretend your chibi is interacting with you in your daily life. Look how small it is compared to your notebook and pencil!
Shading Basics
Adding shading to your chibis is just as important as coloring them. Shading adds depth and volume to your drawings and helps bring them to life. In this section, we will explore some basics of shading to achieve an overall understanding. (This is a general tutorial for practicing with pencil. For shading with color, see Coloring Your Chibis on page 42.)
Pencils
It is my recommendation that mechanical pencils not be used for shading. The graphite leads of mechanical pencils are made hard to prevent flaking and chipping, and as a result, they only make solid, thin lines. You also cannot adjust the thickness of your lines by tilting the pencil, and the hard lead can leave a noticeable dent in the paper, which will linger even after erasing the line. The graphite leads of wooden pencils are much softer, allowing you to draw a variety of lines of different densities and thicknesses. They also can be more easily erased and do not damage paper. While the leads of wooden pencils can flake and chip, these "flaws" can easily be used to your advantage when shading, as they provide more graphite on the paper to blend around.
Light Source
Before you begin shading, it's important to establish a consistent light source for each element of your drawing. For each of these spheres, the blue arrows indicate which side the light is coming from.
The spot that the light is hitting on this sphere is white; the area around it, where the shading is, is not being hit by the light source. The shading should be darkest closest to the highlighted area, slowly softening and fading as it moves farther away.
Shading Techniques
Here are the three easiest techniques for shading with pencil.
Straight lines: Tilt your pencil and make diagonal lines in one direction, filling up the area you want to shade. This is a quick and easy method of shading and provides a light feel to your artwork. It is also a good method for amplifying actions or movement.
Crosshatching: After shading with the straight-lines technique, repeat drawing diagonal lines in a different direction. The lines do not need to be perpendicular to the first set. Crosshatching creates a more solid look than straight lines.
Solid shading: Using a pencil with a blunt tip, hold the pencil vertically and press lightly in a circular motion around the area you want to shade. It is very important to not press too hard, as you will need to go over the area multiple times. This technique is more time-consuming than the other two methods, but it will provide a clean, consistent, and soft patch of shading.
Shadows
When there is an object between the light source and another object, the object in front will cast a shadow onto the object behind it. The shape of this shadow should be consistent with the object it came from. For example, this sphere is casting a circular shadow onto the rectangle behind it. The light source is indicated with the blue arrow.
When shading objects with different textures, the shadow will also be affected. Here, the shadow on the strands of hair follows the flow of the hair, and the shadows on the sleeve follow the folds of the clothing.
Coloring Your Chibis
Now that you understand shading basics, it's time to add color to your chibis. Here's where you can really have fun with your chibis and experiment with color. The step-by-step tutorials following this section will guide you even further with this process!
COLOR
Certain colors complement each other, whether they are contrasting or not (by "contrasting," I'm referring to two colors with a significant difference in tone or that are far apart on the color spectrum, such as black and white or red and indigo blue). Colors that are on opposite sides of the color wheel are complementary colors, such as red and green, orange and blue, and yellow and purple. When used together in an illustration, complementary colors can overwhelm the artwork, so use a lot of one color with a small "pop" of the other color, or use a tint of one of the colors if you want to feature both colors. Here's a color wheel for your reference to see which colors are complementary. And don't be afraid to experiment with color to come up with your own unique color combinations!
MATERIALS
warm, cool, and neutral colors
Colors often fall into three categories: warm, cool, and neutral. Warm colors are easy on the eye and give a feeling of "warmth," and include colors such as red, orange, yellow, and brown. Cool colors are bolder and more striking, and include colors such as blue, green, cyan, purple, and indigo. Neutral colors, also called tones, are black, white, and all shades of gray in between.
SHADING
Here, I've included my method for adding color shading to your chibi art. These are my preferences, but feel free to experiment to find what you like. I like to use cool colors for shading any color. I find that blues and purples work universally well as a shadow color (exceptions are warm yellow and orange, because they are too far on the warm end of the spectrum). When adding shading, you don't always have to use a darker version of the base color. Using a slightly different color will give your art more liveliness and make it look less "flat." When shading, the left side should have the base color and the right side the shading color (assuming the light source is a white light coming from the top-left side). Here are some color combinations (base color and shading color) that I recommend.
BLENDING
Whether you're mixing colors together to create a new color or are adding shading, here's how to seamlessly blend your colors together when using markers, colored pencils, and watercolor paints.
markers
When blending together two colors, always use the lighter of the two to blend. Blend with downward strokes; circular strokes can cause the ink to bleed (spread). "Blender" or "clear" markers will significantly lighten the color, so only use if dispersing a single color around; they are not for blending two or more colors together.
colored pencils
When blending together two colors, always use the lighter of the two to blend. Blend in a circular motion with moderate pressure; otherwise, streaks will appear and you could make dents in the paper. Use a white pencil to blend and smooth out colors, though doing this will make the colors lighter.
watercolor
When using watercolor paint, you can only fully blend colors while the paint is wet. If you must blend a color that has already dried on the paper, re-wet that color with a small amount of water before adding the new color. Watercolor strokes can streak if the brush is too dry, so make sure it's damp. Blend in a circular motion to help prevent streaking. If you have trouble blending with the brush because there is excess water, try blending using a cotton swab or paper towel. Doing this absorbs the extra water while providing a texture to move the colors around with.
GRADIENT
When you apply a gradient, you're applying color that goes from being darker to lighter. If making a gradient with two colors, lay down the lighter color first for the entire area that you are coloring, and then use the darker color on top of the lighter color only in the area you want darker; blend with the lighter color. If using three or more colors, lay down the colors from lightest to darkest, and then use the darker colors on top of the lightest color only in the areas you want darker; blend with the lightest color.
(Continues…)
Excerpted from "Chibi Art Class"
by .
Copyright © 2019 Yoai.
Excerpted by permission of The Quarto Group.
All rights reserved. No part of this excerpt may be reproduced or reprinted without permission in writing from the publisher.
Excerpts are provided by Dial-A-Book Inc. solely for the personal use of visitors to this web site.
Table of Contents
Introduction, 6,
Materials, 8,
PART I: Chibi Basics, 12,
Sketching Your Chibis, 14,
Bodies, 14,
Facial Features, 19,
Hair, 26,
Clothing, 28,
Props and Backgrounds, 34,
Shading Basics, 38,
Coloring Your Chibis, 42,
Practice Chibis, 44,
PART 2: Chibi Cuties, 52,
Jamie, 54,
Phoebe, 58,
Spring, 62,
Abel, 66,
Mother, 70,
Father, 74,
Jules, 78,
Audrey, 82,
Stefan, 86,
Oliver, 90,
Ember, 94,
Desiree, 98,
PART 3: Chibi Beasties, 102,
Kit, 104,
Goldie, 108,
Cotton, 112,
Devin, 116,
Dot, 120,
PART 4: Inspiration Gallery, 124,
Eyes, 126,
Hairstyles, 129,
Clothing, 132,
Props and Accessories, 135,
Ears and Tails, 138,
PART 5: Practice and Coloring Pages, 140,
Draw Your Own, 141,
Color Your Own, 143,
Related Subjects
Customer Reviews
Explore More Items
")


")


