


Essential Natural Plasters: A Guide to Materials, Recipes, and Use
224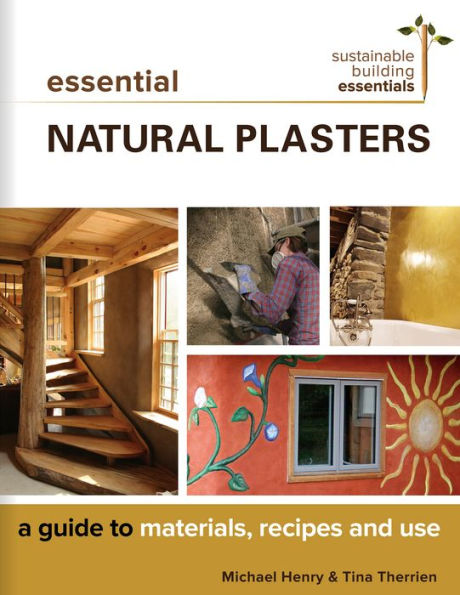
Essential Natural Plasters: A Guide to Materials, Recipes, and Use
224eBook
Available on Compatible NOOK devices, the free NOOK App and in My Digital Library.
Related collections and offers
Overview
A veritable cookbook of natural plaster recipes and techniques for beautiful, durable finishes
Natural plasters made of clay, lime, and other materials mixed with sand are beautiful building finishes. Fun to work with, low-impact, and allowing infinite creativity, they are high performance and provide proven, centuries-long durability.
Yet until now there's been no resource that has pulled together the best North American plaster recipes and how-to into one place. Essential Natural Plasters covers it all:
- Sourcing and selecting materials, including site-soils
- Clay, lime, and gypsum plasters as well as fibers and amendments
- Interior and exterior use and specialty plasters such as tadelakt for bathrooms
- Preparing substrates, from straw bales and cob to lath and Sheetrock
- How to set up a safe, efficient worksite
- Mixing, testing, tinting, repairing, and applying plasters
- Coveted recipes from leading plasterers in Ontario, Vermont, New Mexico, France, and New Zealand.
Richly illustrated and deeply researched, Essential Natural Plasters is the must-have resource for owner-builders and professionals alike.

Product Details
| ISBN-13: | 9781771422581 |
|---|---|
| Publisher: | New Society Publishers |
| Publication date: | 06/26/2018 |
| Series: | Sustainable Building Essentials Series , #7 |
| Sold by: | Barnes & Noble |
| Format: | eBook |
| Pages: | 224 |
| File size: | 22 MB |
| Note: | This product may take a few minutes to download. |
| Age Range: | 16 - 18 Years |
About the Author
Michael Henry has researched plasters and plastered his way across Ontario for the past decade, plastering for Camel's Back Construction and Straworks. His attention to detail and mad-scientist plaster experiments have made him a noted expert in the field and a sought-after workshop leader on plasters at the Endeavour Centre. Michael is co-author of Ontario's Old-Growth Forests, and he lives in Peterborough, Ontario, with his wife and two children. He shares his plastering knowledge at thesustainablehome.net.
Tina Therrien started plastering in 1997 as part of Camel's Back Construction, the first straw bale building company in Ontario. One of the founding members of the Ontario Natural Building Coalition, Tina has made numerous contributions in the natural building world and has plastered in France and Haiti. Passionate about food, gardening, and chickens, Tina lives in a modest timber frame home with her spouse, daughter, their flock of chickens, and their slowly expanding gardens. She is co-author of More Straw Bale Building, and she operates Shelter By Hand, a timber framing company, with her spouse. She lives in Low, Quebec.
Michael Henry has researched plasters and plastered his way across Ontario for the past decade, plastering for Camel's Back Construction and Straworks. Michael he lives in Peterborough, Ontario.
Tina Therrien started plastering in 1997 as part of Camel's Back Construction, the first straw bale building company in Ontario. Tina lives in a modest timber frame home with her spouse, daughter, their flock of chickens, and their slowly expanding gardens. She lives in Low, Quebec.
Read an Excerpt
1 Introduction
Natural plasters are beautiful, non-toxic to live with (though not always to work with) and steeped in tradition. The act of plastering is generally enjoyable, even addictive for some, but very hard work. It's also serious business – along with roof and flashing details, the plaster skin of a building protects the materials inside from degradation by water, wind, sun and animals. The job of the natural plasterer today is to take millennia-old techniques and materials, combine them where appropriate with contemporary materials and tools, and employ them safely and efficiently on a modern construction site. This book gives detailed direction on how to do this. Many natural builders have collaborated to share their expertise in this book; the cross-section of recipes, and the approaches to plastering they reflect, make this book a valuable resource for beginner and professional alike.
Why use natural plasters
Before we launch into nine chapters on how to use natural plasters, it's worth taking a moment to reflect on why we would want to use them. There are two kinds of situations in which we'd be likely to use natural plasters: to cover a natural wall system, in which case the permeability and flexibility is important, if not essential; or over other wall systems, such as a stud wall sheathed with wood lath or drywall, where natural plasters add beauty and are a non-toxic alternative to paint or other wall finishes.
Here's a short list of some of the advantages of natural plasters:
- In our increasingly sealed homes indoor air quality is important, and there's a growing body of evidence that the chemicals we surround ourselves with can cause harm in relatively low concentrations. Natural plasters are free of these environmental toxins.
- Natural plasters connect us to our heritage, and have a track record going back thousands of years. We know that they work, and how they interact with other natural building materials, including wood. Unfortunately some of this knowledge has nearly been lost, but as a natural plasterer you can help keep this knowledge alive.
- Natural plasters have greater flexibility and vapour permeability than most synthetic materials. They tend to protect the materials they are bonded to from moisture damage. They are essential as a coating for many forms of natural building, and can be beneficial for many forms of conventional construction.
- Natural plasters typically have a low embodied energy - the energy it takes to mine, process, and transport them. They may be locally available, contributing to local economies and further reducing their ecological impact.
- They are beautiful. There is evidence that human happiness is tied to our connections to the natural world, and natural plasters likely contribute to human well-being by introducing natural products, forms and textures into homes.
- Natural plasters can help regulate temperature and humidity in homes, improving comfort and reducing the need for air conditioning and heating.
While at heart this is a recipe book, to be a successful plasterer you will need to understand the materials, and how they interact with environment, substrate and design.
The opening chapters of this book describe the materials, how to design for them, how to prepare the walls, and how to mix and apply natural plasters in general. It's tempting to jump straight into putting mud on the walls, but the preparatory steps leading up to that moment are more likely to determine success or failure than the days spent plastering. Chapter 3 is probably the most important chapter in this book.
Before you begin make sure you have chosen the best plaster for your application, and that your house is designed appropriately.
Too often we have been called to repair plasters that weren't appropriate for the site or design of the building. This may cause the plaster to fail quickly, or even worse can cause damage to the underlying building materials.
When you're ready to plaster, chapters 5 through 8 tell you exactly how to process and use earth, lime, gypsum and cement plasters, including recipes for a wide variety of plasters. A plaster recipe is only a starting point. When you use a recipe from this book there will be a learning stage while you come to understand the properties of the plaster; how to lay it on the wall; how thick it can be applied; how long it needs to set up before a finishing pass; whether it needs burnishing or compression; how many coats are needed. Much of this information can be gleaned from the recipe, but other things you'll have to learn by doing. This all becomes more complicated in the real world, because when you change the substrate, or use a different aggregate in your plaster, or if the weather is different while you're working, you will have a different result.
The first time you use a recipe always do tests
Then if possible try it on a wall at home before plastering a whole room or a whole house. Get to know the plaster and understand how it works with your locally available materials. Take notes: how much water did you add to the mix; how long does it take to set up to 'leather hard'; did you burnish it, and if so after how long; at what depth did you apply it; did you use a steel trowel; did it crack? Check the coverage rate – rates in the recipe are only given as guidelines.
Good notes are essential when you start modifying recipes, which will happen sooner than you expect. When you change a recipe, try to change one thing at a time. If it's cracking, try adding aggregate, or changing the type of aggregate, or add fibre, or simply apply it in a thinner coat
Finally, be cautious. The world needs cowboys, but don't be a cowboy on someone else's house, try to do your inventing on a wall of your own house, or preferably an outbuilding. Use your mistakes as learning opportunities. Take it seriously, but have fun too
***
5 Earth plaster base coats
About base coats
The base coat provides the majority of the strength of earth plasters. This strength comes from the depth of the application (typically around ¾ inch) and from the relatively high fibre content (commonly 10-30% of the mix). In general we can think of base coats as falling into two categories: clay-straw plaster, which might have a ratio of around 1 clay: 1 sand: 1 fibre; or clay-sand plaster, which might have a ratio of 1 clay: 3 sand: <½ fiber – in reality it's a spectrum, not an either/or situation, but we find that this distinction is a useful way to think about base coats. In general, a more straw-based plaster will have greater strength, especially when applied over a weaker substrate such as straw bale; but a sand-based plaster will be easier and faster to apply for experienced plasterers.
| Clay-Straw Plaster | |||
| Typical Ratio |
| ||
| **Application** | Hand application, then levelled with a float or trowel | ||
| **Advantages** | Very strong, resistant to cracking, bridges transitions well. Can be applied by an inexperienced or volunteer crew. | ||
| **Indicated when** | Substrate is weak, or transitions may cause cracking; or when volunteer labour is available. | ||
| Clay-Sand Plaster | |||
| Typical Ratio |
| ||
| **Application** | Trowel application, in two passes (see XX) | ||
| **Advantages** | Faster to mix and apply | ||
| **Indicated when** | Substrate is solid; an experienced crew is available; labour costs are high and/or schedule is tight; additives such as manure are available. | ||
Preparations
Most preparations for earth plasters will be the same as for any other natural plaster (see chapter 3), but there are some exceptions.
- Use curved corners for most outside-corners, because earth plasters are the weakest plaster and square corners are very prone to damage.
- Stuff and fill voids with slip straw or cob - bare straw stuffing may pull out of the wall during plastering.
- Avoid using metal in the prep, even galvanized metal, because earth plasters tend to cause rust. Metal fasteners will be inevitable in many situations (use coated or galvanized), but large areas of metal lath may cause problems.
- Because clay is hydrophilic, wood may not always need a barrier from the plaster to protect it from rot.
Mixing and application details
Base coats are usually mixed in a mortar mixer (p. xx). When a clay slip is used, start with all of the clay slip in place of water, then half the sand etc. The final consistency of the plaster should usually be sticky and fairly wet, but not sloppy.
If a mortar mixer isn't available, or only a small amount of mix is needed, it can be mixed by hand. It is easiest to add the fibre last, after mixing all the other ingredients with a paddle mixer. The fibre usually needs to be mixed in by hand, or with a hoe etc.
Earth base coats need pressure to bond well to the substrate. There are couple of ways to achieve this. The first is hand application; there's nothing like hands to work plaster into the substrate. After applying roughly the desired thickness of mud by hand, it may be leveled and compressed, usually with a wood float. This is the best (and often only) way to apply a very straw-rich base coat, though it is usually slower than trowel application.
The second way to get a good bond to substrate is to use a rigid steel trowel in two passes, with the first pass pushing mud in and the second adding depth (see chapter 5, p. xx for a detailed description of the technique). When the mud is sufficiently workable, this is the fastest way to apply a base coat. And if it is done conscientiously, with the right mix, it's possible to get a bond that is comparable to hand application.
How to process site soil
Maybe you've decided to use site clay, and you have a pile of soil sitting on your jobsite - but it may be rock hard, or incredibly sticky globs, and it likely contains stones that need to be sieved out.
There are several good ways to process site clay, but all of them will be easier if the clay sits in a shallow pile, covered by a tarp, through one or more winters. The freeze-thaw cycles help break down the most intractable clumps into a more soil-like product. That said, most people won't have the luxury of this much time.
Processing dry or damp
Soil can be sieved when slightly damp but somewhat crumbly. This requires a good quality, heavy screen with around 1/8 inch openings. You will end up pushing the soil through the screen by hand. Even pushing through a 1/8 inch screen the result is a little coarser than you'd get from processing wet, but is suitable for base coats – if a coarser screen is used you risk having clay lumps pop out of your plaster.
Soil can also be dried completely by spreading it on a tarp, then pulverised and sieved through a finer screen. This is a good option if you have access to a machine to pulverise the soil, such as a hammer mill. The advantages are that it's easier to store and use on short notice, and it can be screened finer than damp clay.
Processing as slip
Site soil is most commonly processed into slip, because a very good quality product can be made with equipment that may already be onsite for mixing. Preparation of clay slip should start at least the day before mixing to get a good stockpile. The person in charge of mixing, or someone else who is delegated with making slip, will need to keep a barrel of slip mixing most of the time during plastering. There are two approaches to making slip:
- Soak the clay in barrels for a few days, or weeks, before stirring it. If you have a lot of barrels available this is a good option. When it's time to make the slip it will take some effort to get the clay into suspension, but then it will mix easily and thoroughly.
- Add unsoaked clay directly while mixing the slip. To be successful in this technique it helps to have a very good stirring method and add the clay while maintaining a fairly steady vortex.
Both these methods require similar steps, let's start with the second technique.
- Start with a heavy duty mixing drill that can withstand running for hours, and a barrel with one end open.
- Make a setup to hold the drill in place (some drills or paddle mixers have attachment points for this, others you may need to use All Round steel strapping (found in plumbing section of stores) or another method of your choice. A drill press can be a very elegant option.
- You'll need a very good paddle mixing attachment - our favourite off the shelf mixer is the twister M630. We've also used the Kraft Tools DC303, a 24″ mixer with three small propeller blades to keep the slip moving even as it gets thick. Since the blades are removable from the shaft, a separate metal rod of the correct diameter may be cut to length and used as the shaft. One of the best systems we've seen is a boat propeller welded to a shaft, used by Quebec plasterer Andrew MacKay.
- Fill the barrel about 1/3 full of water, measure exactly how much you are using because you need to keep the slip consistent for your recipe.
- Start the mixer spinning in the water before you start adding clay to the barrel - once you have a vortex, start adding the clay. Keep careful track of how much clay you are adding relative to the water. We find about 2 clay: 1 water by volume is quite manageable, and that is the minimum required for most recipes (some recipes will require a higher ratio of clay).
- Add all the clay and leave the suspension spinning for at least an hour. Halfway through stir to the bottom, either by moving the mixer around, or removing the mixer and stirring with a shovel.
- When the slip is well mixed, sieve through a screen (1/8-1/4 inch) into a holding tub or trough.
- A slip storage trough may be made using a good tarp or vapour barrier draped over bales. Process at least two barrels of slip before you start mixing plaster, or you'll get behind on slip.
- Keep it well covered when you're not using it to keep rain, frogs, leaves etc. out of the slip.
To process clay that has been slaking in barrels, follow roughly the same strategy but move the drill and mounting apparatus to whichever barrel is next.
Wedging clay in the mixer (for lime-stabilized earth)
We learned this technique from the Natural Building Companion , and for body coats it works well if the site soil isn't too rocky. This method can only be used for lime-stabilized earth recipes, because the lime is necessary to break up the soil structure.
This process is like making cookies – first you cream the sugar into the butter, then you very slowly add liquid, working it in as you go until the whole thing reaches a nice even creaminess. In this case though, the butter is the clay, the sugar is dry lime powder, and it all happens in a mortar mixer.
- Shovel or bucket the amount of clay soil that's needed into the mortar mixer.
- Add the lime that's called for in the recipe (commonly around 20-50% of the clay amount) and a small amount of water, just enough that the mixer paddles can start to drag at the clods of clay. The lime will cause the clay to flocculate (agglomerate into collections of particles) and become less sticky and plastic. This helps the mixer break it up, and it will slowly begin to cream and soften. A small amo nt of sand may be added at this stage.
- After 5 minutes, small amounts of mix water can be dribbled in to make the whole thing softer and creamier until it turns into something more like a putty. Add remaining mix water slowly.
- Add the remaining ingredients.
Slip coats and adhesion coats
Earth plaster doesn't adhere well to some common wall surfaces, including straw bales, so an intermediate coat is often needed. Carole Crews uses her clay soil, thinned with water until it is sloppy and just possible to pick it up, and pushes this into straw bales by hand to create a bonding coat. However it's more common to spray a coat of clay slip when extra adhesion is needed.
You will likely need a slip coat for:
- Straw bale walls
- Old plaster walls that are eroded, loose or dusty
- Earth walls that are too smooth (may also need mechanical abrasion)
- Any surface where a test patch of plaster can easily be pulled off
Clay slip is just blended clay and water. Techniques for processing soil are described earlier. If using bagged clay, add the clay powder to the water, wait a few minutes for it to sink in, then stir it with a paddle mixer.
| For either site clay or bagged clay, use a ratio of about 1.5 clay : 1 water, adjusted until the consistency is like a thick chocolate milk (but thinner than a milkshake). If you put your hand into the bucket it should come out wearing a thin, opaque "glove" of clay slip. |
Spraying slip coats
- A drywall texture gun hooked up to a medium-duty compressor works very well for spraying slip.
- On straw bales keep the sprayer within a foot or less of the wall to force the slip into the bale, and apply it fairly heavily so that you don't see bare straw.
- This is a fairly fast operation; one person can spray one or two walls and then join the trowelers to plaster them.
- Let the slip to set up slightly before plastering over it (usually 5-10 minutes depending on drying conditions).
- Do not mist the wall before spraying slip! If the slip starts to dry out completely before being covered by plaster, you should mist those areas before working them, or you may apply more slip.
- Always use a respirator to spray slip, and avoid spraying near unprotected co-workers.
Table of Contents
Chapter 1: Introduction
Chapter 2: Natural Plaster Ingredients
Chapter 3: Planning and Preparation
Chapter 4: Mixing and Application
Chapter 5: Earth Plaster Base Coats
Recipe: Project Karyne Base Coat from Site Soil
Recipe: Easily Workable Base Coat Using Bagged Clay
Recipe: Straw-Clay Mud
Recipe: Lime-Stabilized Base Coat Using Bagged Clay or Site Clay
Recipe: Straworks' Baseball Diamond Mix
Recipe: La Couche de Corps
Recipe: Super Sticky Upside-Down Mix
Chapter 6: Earth Plaster Finish Coats
Recipe: All-Purpose Finish Plaster
Recipe: Pigmented Finish Plaster with Fiber
Recipe: Silty Subsoil Dolomite Sand Top Coat
Recipe: Fat Plaster
Recipe: Finish Coat with "Mayonnaise"
Recipe: Finish Coat Using Bagged Clay
Recipe: Glen's Wet-Burnish Plaster
Recipe: Finish Clay Plaster with Shredded Paper or Cellulose
Recipe: Polishing Clay Plaster
Recipe: Starch Paste
Recipe: Rice or Corn Starch Paste
Chapter 7: Lime Plasters
Lime Recipe: Simple Hydrated Lime Plaster
Lime Recipe: Traditional Lime Putty-Based Scratch Coat with Hair Reinforcement
Lime Recipe: Multi-Functional Hemp Lime Coating
Lime Recipe: Lime Plaster with Manure
Lime Recipe: Lime Plaster with Paper Pulp
Lime Recipe: Tadelakt
Lime Recipe: Stuc/Chevy Tadelakt
Lime Recipe: Hot Mixed Lime Mortars
Lime Recipe: Harling, Rough Cast, and Pebble Dash as External Lime Plastering Finishes
Lime Recipe: Homemade Hydraulic Lime Base Coat
Chapter 8: More Binders
Chapter 9: Finishes and Aftercare
Recipe: Carole Crews' Favorite Alis
Appendix 1: Coverage Estimates and Conversions
Appendix 2: Resources
Contributors
Index
About the Authors
A Note About the Publisher
What People are Saying About This
"More than a book on plasters, Essential Natural Plasters delves deep into the world of natural building, explaining the detailing and function of walls finished with natural plasters in addition to the fundamentals of plasters made from earth, lime, and gypsum. It covers the spectrum of natural plasters, providing fundamental advice on mixing, application, and finishing, but also discusses often overlooked details such as masking and maintenance. Including tons of recipes, Essential Natural Plasters should be in the hands of every natural builder."
— Kyle Holzhueter, PhD, First Degree Certified Plasterer, Permaculture Center, Kamimomi, Japan
"This is hands down the most comprehensive book on natural plasters that I've ever read. The authors include information you'd expect in a textbook, yet they write in a clear, easy-to-read style. Everything you'd want to know about natural plaster is included - from preparation and planning, through choosing materials, application techniques, and even recipes. Essential Natural Plasters is indeed essential for every natural builder's library."
— Sigi Koko, Down to Earth Designs, www.buildnaturally.com
"From an engineer's point-of-view, plaster can be both a weak point and a strength in a natural material wall assembly. Tina and Michael, supported by their myriad plastering guru contributors, have curated a wonderfully broad and incredibly detailed recipe book for anyone who wants to work with natural plasters. There is background on a wide variety of materials, wisdom from many projects, and inspiration galore here. For anyone from beginner wall finisher to expert plasterer, this is a valuable resource - one that moves the state of the art forward here in North America."
— Tim Krahn, P. Eng., structural engineer at Building Alternatives Inc.
"Essential Natural Plasters: A Guide to Materials, Recipes, and Use is aptly named. Tina Therrien and Michael Henry have delivered a thorough and honest easy-to-read guide for anyone interested or working in the natural plaster field. This book guides the reader through the stages of plaster work, beginning with onsite and personal safety and closing with much-needed coverage calculations that only a professional would know. They have given the reader an unprecedented 27 plaster recipes from around the world developed by professionals to help guide others in the complex and temperamental field of working with natural materials. The information in the book will save others years of personal study and experimentation I wish I had this book 20 years ago when I started out."
— Janine Bjornson, Natural Builder, Educator, and Consultant
"Tina Therrien and Michael Henry have created a superb, comprehensive, and well-illustrated guide to natural plasters. Drawing on their own extensive experience, and the experience and wisdom of other leaders in this field, they have woven together a treasure trove of practical and insightful information about materials, processes, decision-making, recipes, tricks of the trade, and essential practices."
— David Eisenberg, Director, Development Center for Appropriate Technology
"Essential Natural Plasters is the book I've been waiting for - clear, concise, and thorough knowledge delivered in a thoughtfully organized format. Finally, a book for plasterers by plasterers with a fountain of knowledge on the subject and a killer selection of recipes, to boot. This is easily my new go-to resource for all things natural plaster in North America."
— Ziggy Liloia, owner, instructor, builder, The Year of Mud
"Essential Natural Plasters is definitely an essential book for anyone wanting to understand the complex art of mixing and applying appropriate natural plasters both inside and outside their building project. The authors have drawn on their extensive experience as professional plasterers, as well as the expertise of numerous others well-versed in the art of plastering. The myriad recipes for specific plasters for virtually every application is well worth the price of the book alone."
— Kelly Hart, author, Essential Earthbag Construction and founder, www.greenhomebuilding.com
"Born-again natural builders, in these pages you can hear the voices of the past researcher and former educator who are the authors. Essential Natural Plasters is one part carefully detailed cookbook to three parts practical, shared experience, blended deftly with an admixture of inspiration and a dash of humor. Together, Tina and Michael reveal the great secret recipe that is natural plastering: experiment, fail, repeat, enjoy."
— Ben Polley, co-founder, Evolve Builders Group Inc, founder, Fermata - Works of Earth