
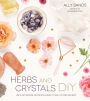

Herbs and Crystals DIY: Use Plant Medicine and Crystal Energy to Heal the Mind and Body
160
Herbs and Crystals DIY: Use Plant Medicine and Crystal Energy to Heal the Mind and Body
160Paperback
-
PICK UP IN STORECheck Availability at Nearby Stores
Available within 2 business hours
Related collections and offers
Overview
Ally Sands—master herbalist and founder of Aquarian Soul—shares her expertise on healing herbal properties, as well as how to effectively use over twenty different crystals, including amethyst, opal and rose quartz. When these powerhouses are used together, they form a potent combination to relax, energize and help you live a happier and healthier life. Every project—from a passion flower tincture, to a wild flower and crystals face steam, to building a crystal mandala—focuses on improving mental and physical wellness.
Whether you are looking to alleviate anxiety, practice mindfulness or enhance your beauty routine, Ally’s unique recipes and crafts will show you how best to harness the incredible power of herbs and crystals.

Product Details
| ISBN-13: | 9781624145216 |
|---|---|
| Publisher: | Page Street Publishing |
| Publication date: | 04/17/2018 |
| Pages: | 160 |
| Sales rank: | 644,444 |
| Product dimensions: | 7.90(w) x 8.90(h) x 0.60(d) |
About the Author
Read an Excerpt
CHAPTER 1
WINTER SOLSTICE
Winter solstice is known worldwide as the shortest day of the year. This day is also known as Yule, the pagan holiday that celebrates the longest night of the year and the rebirth of the sun. Traditionally, bonfires are lit and fireplaces are filled with gifted logs to celebrate the newborn sun. The plants represented by this time are pine, cedar, oak, holly and wintergreen. This is a time when I venture into the mountains adjacent to the Sonoran Desert to pick piñon pine and California incense cedar. Going to the mountains means driving through clouds, mist and fog. It is like entering a hazy nebula. A light drizzle of rain falls all around me as I climb the pines, gently pulling the needles of the willing tree and piling them into my basket. Later on, I will use this greenery to infuse various oils.
It is during the winter solstice that the earth remains dormant, giving birth only to strong, tall and resinous trees while the rest of the tender herbs lie in wait to bloom in the spring. This is a time for rest, taking care of your body and turning inwards. It is during this time that I love using the Wildflowers Crystals Face Steam to infuse my dry skin with moisture. The Crystal Face Massage helps get stagnant energy moving during these reclusive winter months, and the Piñon Pine Cone Incense makes use of the pine needles gathered during this time.
PIÑON PINE CONE INCENSE
I grew up going to the desert on the occasional weekend throughout the year. I was used to seeing yucca, chaparral, cholla and a variety of other desert plants, but I was never familiarized with the beautiful piñon pine. It wasn't until a few years ago that I began to collect its needles and its gooey resin to take home and experiment with. This pine is special. It has a much fruitier, more complex aroma than a more traditional pine scent. I knew I had to make something out of it to preserve its scent all year long, so I came up with this recipe for piñon pine cones!
This incense is the combustible kind. You only need to light it once to keep it burning on its own. This is much more convenient to burn than the loose variety — even though it may not be as pretty, it sure smells just as great.
MAKES 30 cones
INGREDIENTS
1 cup (118 g) of piñon pine powder
SUPPLIES
baking sheet blender (or coffee grinder, food processor)
To make the pine powder, first you will need to collect about 1 pound (0.45 kg) of dried pine material. For additional tips on foraging, see here. You will be using only the needles, so strip those off the stems and place them on a baking sheet. Be careful with these pine needles as they have a rather sharp tip, unlike more common pine varieties. (I like to wear gloves for the process.)
Spread an even layer of the needles onto your baking sheet and dehydrate these in the oven on the lowest setting for about 6 to 8 hours. If you have a dehydrator you can of course use it instead! You can also naturally dry these, but it may take a month or more for them to fully dry. When they are completely dry, place them in a high-speed blender until they turn into a powder. You can also use a food processor or coffee grinder to achieve similar results. Just make sure this is a blender or coffee grinder you will be using exclusively for herbs as the scent will linger.
Now that you have the powder, mix 1 cup (118 g) of it with ? cup (33 g) of the makko powder in a bowl. Slowly add the water by the spoonful so you don't get it too wet. The mixture should be moist enough to form a ball, but not gooey.
Once you have your mixture at the right consistency, form a small ball about ½ inch (1.3 cm) in diameter. Begin to roll the ball between your palms forming a "snake." Shape one end to a point, and tap the other end against your work surface to form a flat end for the cone to stand on.
Your cones don't have to be perfect and can be as long or as short as you want.
Leave the cones to dry on a piece of parchment paper overnight. Tip the cones over about halfway through the drying process to allow the bottoms to dry.
Once they are completely dry, you can store these in a glass jar or bag until you are ready to use them.
To use the incense, place a single cone on a heatproof dish (you can add a layer of sand if you like) and light the tip. Blow out the flame, and allow the smoke to envelop your senses.
NOTE: You can use a wide variety of other herbs to make these cones as well. Just make sure your herbs are finely powdered so they burn evenly. Try rose, lavender, sage, chamomile or palo santo!
WILDFLOWERS + CRYSTALS FACE STEAM
Steaming is a great way to infuse botanicals into your skin. Combining them with crystals makes for a complete healing facial. If you have access to a garden and can grow these botanicals yourself, even better! Once you see the difference in colors and how vibrant the homegrown version is versus commercially packaged herbs, it will be hard to go back! Bright orange calendulas, eye-catching periwinkle blue cornflowers and hot pink rose buds right from your garden will make for the most relaxing and beautiful face steam you have ever tried!
There are many ways our bodies can absorb the crystals' energies, whether it's rubbing them into the skin through gemstone-infused oils, wearing them as a piece of jewelry or in a bath by energizing the water. Placing a stone into your steam acts in a similar way to energize your bath water. The energy flows from the water straight into your skin.
INGREDIENTS
1 cup (26 g) dried rose petals
SUPPLIES
mixing bowl large spoon
Place all your dried flowers into a large mixing bowl. Use your spoon to combine.
Place your face steam blend into small paper coffee bags, like Kraft coffee bags. Each bag should hold about 1 cup (24 g). These make the blend perfect for gifting. If you want to preserve your blend for a longer period of time, you can place it in a small glass jar.
To use, heat up about 4 cups (approximately 1 L) of water in a kettle. Turn it off as soon as you hear it begin to boil. Pour the water into a bowl large enough to cover your entire face.
Place a couple of large pinches of the blend and the 2 crystals into the hot water. Place your face about 10 to 12 inches (25 to 30 cm) away from the water. Place a towel over your head so that the steam doesn't escape. Make sure you are comfortable and that the steam isn't too hot. You can occasionally open the towel if you need to take a breather or raise your head a little higher away from the bowl.
Steam for about 10 minutes if you can handle it, but at least 5 to 6 minutes if it's your first time. You can slowly build up the time under the steam once you get used to it.
Once you have finished the steam, follow up with your cleansing routine and rinse with cool water to close your pores at the end.
Your face should feel smooth and refreshed and your pores should look a little tighter. I love doing this once a week!
CLEANSING RITUAL BATH
Taking baths is one of my favorite things to do, not only before practicing magic but as a weekly ritual where I sit with my thoughts and nothing else for 30 minutes. I always keep the space beautiful with crystals, candles and fresh flowers. When you enter the special space you have created in your bathtub, let your thoughts, worries and any negative, held-in energy you have been carrying around spill out into the water. Totally let go. It is a cleansing process not only of your physical body but of your mental state as well. It is an important step before beginning a ritual, spell or any kind of magical work you plan on doing — whether it's a crystal layout, meditation or actual incantations. You want to enter the space free of negative emotions and feeling fresh and renewed.
Winter solstice is the perfect time to indulge in a cleansing ritual bath. This is not only a recipe for your bath but a total immersive experience.
INGREDIENTS
¼ cup (61 g) of coconut milk powder (or canned coconut milk)
SUPPLIES
sage wand fine mesh sieve
Ground yourself. This can be achieved in many different ways, but it is essential before doing any ritual work. Close your eyes and take several deep breaths. Imagine you are breathing in a white healing light and exhaling any negative thoughts and energy. Plant your feet into the ground and imagine you are a tree and your roots are growing deep into the earth. You can also imagine a cord or beam of light, whatever resonates with you. Take in the energy of the earth, and feel it envelop your body. Feel yourself tethered to the earth. You are safe and secure now.
Make sure your bathing area is clean and free of any clutter. You want your environment to be pristine. Also, clean your body by showering beforehand, or take a bath on a day you have already showered. Light candles and set up any crystals you are currently working with around the edge of the tub. Add extra flowers here too if you want. Fill your tub with warm water. Add in your coconut powder, hibiscus powder and salt. Add in your crystals to the bottom of the tub. Sprinkle the flowers and herbs on the surface of the water.
Set an intention for this bathing ritual. Call forth any spirit guide you work with or whatever higher power or universal energies you believe in. You will be releasing any useless behavioral patterns and old emotional baggage and inviting a renewed energy into your life. Try to align your bath with the new moon, as this ritual will be most powerful on this night, but this will work any day if you need it.
Light your sage wand and let the smoke billow into all the corners of the room. Let the sage envelop your body, moving from your head down to your toes. Put the sage out or let it smolder in a dish until it goes out on its own.
When you feel ready, immerse yourself in the bath. Dip your head into the bath. Soak for 20 to 30 minutes. Let go of any thoughts and worries from the day. Let yourself be completely in the moment. Drain your tub, making sure to use a mesh sieve to skim the wilted botanicals from the water. Throw these into your compost bin or out into your garden, anywhere away from your home. These carry the energies you have released. Do not rinse or bathe for the rest of the day. You will want to let the ingredients soak into your skin.
LINEN FORAGING APRON
Typically, when I am wild harvesting plants, I carry a couple of baskets with me. But sometimes it would be a lot easier if I just had a big ol' pouch to put things in, especially if I have to, say, climb a tree to get what I need. This is where the foraging apron comes in. It also has pockets for keeping your shears, notebook or phone handy. This is a great project to work on during the winter months so you can be prepared come spring equinox.
For this project, I will be using linen, but you can of course substitute a denim, canvas or cotton fabric. Linen is one of my favorite natural fabrics. I love the way it crinkles and wears with washing. But if you like to harvest, let's say, something woody like cedar or pine, it might get too heavy for a linen to handle. Then I would suggest using a thicker material like a canvas. Linen is best for harvesting lighter plants and flowers. Whatever material you choose for your apron, you will love wearing it on your next adventure!
MATERIALS
2 yds (1.8 m) of linen fabric
SUPPLIES
measuring tape yardstick ruler sewing chalk scissors iron sewing machine buttonhole foot for your machine sewing needles
To begin, measure around the widest part of your chest and from your shoulders down to your knee. Note the measurements on a pad of paper. This is meant to be a loose-fitting apron, and it has some give as it is completely open in the back. Add 6 inches (15 cm) to your measurement around the chest.
Using your measuring tape or ruler, mark your measurements on the fabric and cut a rectangle X (your measurement) inches wide by 42 inches (107 cm) long. This will make your apron about knee length when it is complete.
Fold the sides in ½ inch (1.25 cm) and press with the iron. Fold over once more to hide the seam another 1½ inches (4 cm) and sew.
For the top and bottom, fold the sides in ½ inch (1.25 cm) and press with the iron. Fold over 2 inches (5 cm) and sew. This gives the top part a more distinctive hem.
FOR THE STRAPS
Measure out 2 strips of fabric 6 inches (15 cm) by 28 inches (71 cm). Fold the strips in half vertically and sew with a ¼-inch (0.5-cm) hem along the entire length. Sew one of the open edges with the same ¼-inch (0.5-cm) hem. Using your finger or pencil, start to turn the strap inside out by pushing into the sewn edge and working it through the open edge. Flatten the straps with your fingers and press with the iron. Set these aside.
FOR THE UPPER POCKET
Cut an 8 x 13-inch (20 x 33-cm) rectangle. Fold in all the edges ½ inch (1.25 cm) and press with an iron. Fold the top edge another ¾ inch (2 cm) and sew. Place the pocket 3 inches (7.5 cm) from the top, and make sure it sits in the center. Pin down and sew along the two sides and the bottom edge. Keep the top open as this will form your pocket.
If you want to reinforce your pocket as well as add some smaller compartments for pens and a notebook, measure out the sizes you want and sew down the pocket vertically. When you go over the open edge of the pocket, reverse and sew back and forth a few times to really secure it so that when you are taking things in and out of your pocket, the thread doesn't become loose over time.
FOR THE SMALL POCKET
Cut a 8½ x 6½-inch (21.5 x 16.5-cm) rectangle. Fold over what will be the top edge of the pocket (one of the shorter edges) at ½ inch (1.25 cm) and press with the iron. Fold over another 1 inch (2.5 cm) and sew. Fold over all the remaining edges ½ inch (1.25 cm) and press. To place the pocket, measure 3 inches (7.5 cm) down from the upper pocket, and mark with your chalk. Fold the apron in half and measure 3 inches (7.5 cm) from the center and mark again. Place your pocket and secure with pins. Sew around the edges, leaving the top open to form the pocket.
FOR THE LARGE GATHERED POCKET
This will be the trickiest part (it took me a few times to get it just right).
Measure out a 19 x 36-inch (48 x 91-cm) rectangle. Fold it in half horizontally. Cut the 2 bottom corners into a slightly rounded shape, cutting off only about 2 inches (5 cm) of the corner, and then unfold. On the top edge (one of the 36-inch [91-cm] sides) we will be creating a casing for the drawstring to pull through. For this casing, fold over ¼ inch (0.5 cm) and press. Then fold over another ½ inch (1.25 cm) and sew with a ½-inch (1.25-cm) seam. You will want to leave enough of a space for your cord to move through easily.
On the bottom edge, you will sew 2 rows, about ¼ inch (0.5 cm) apart. Place your stitch length on your sewing machine on the highest setting, which is a basting stitch. This is a loose stitch to keep fabric in place and is not a permanent stitch. This will allow you to gather the edge and scrunch it together. Start at the top of the curve on one side and sew all along the bottom edge at ½ inch (1.25 cm), ending up on the other side of the curve. Repeat this step ¼ inch (0.5 cm) above the previous row of stitches. When you are done, hold the ends of the thread in one hand, and with the other, pull on the fabric, beginning to gather it together. Do this on each end and scrunch towards the middle. Make sure the gathering is even and does not bunch up in one area. With the gathering, it should now measure approximately 20 inches (51 cm).
(Continues…)
Excerpted from "Herbs And Crystals Diy"
by .
Copyright © 2018 Ally Sands.
Excerpted by permission of Page Street Publishing Co..
All rights reserved. No part of this excerpt may be reproduced or reprinted without permission in writing from the publisher.
Excerpts are provided by Dial-A-Book Inc. solely for the personal use of visitors to this web site.
Table of Contents
Introduction 9
Winter Solstice 13
Piñon Pine Cone Incense 14
WiIdflowers + Crystals Face Steam 16
Cleansing Ritual Bath 19
Linen Foraging Apron 20
Gem Elixirs 24
Hibiscus Rose Bath Melts 26
Pine Resin Salve 28
Cardamom Rose Chai 30
Eucalyptus Shower Swag 32
Crystal Face Massage 35
Spring Equinox 37
Floral Smudge Wand 39
Native Wildflower Seed Bombs 41
Lavender Hydrosol 45
Rose Petal Wine 49
Ocotillo Flower Essence 50
White Sage Honey 53
Crystal Strawflower Dream Catcher 54
Sweetgrass & Wildflowers Loose Incense 58
Wildflower Plant ID Journal 60
White Sage & Creosote Healing Balm 65
Lemon Balm Mojito with Edible Flowers 67
Summer Solstice 69
Orange Blossom Body Balm 70
Sweetgrass Braids 72
Passionflower Tincture 74
Botanical Soap 76
Intention Mists 81
Floral Cleansing Grains 84 Floral Body Oil 82
Rose Sc Quartz Hair Comb 86
Solar Herbal Tea & Floral Ice Cubes 88
Herbal Shave Ice 90
Fall Equinox 93
Crystal Oracle 95
Full Moon Ritual Kit 103
Zodiac Crystal Candle 106
Crystal Love Mandala 111
Lunar Bath Soaks 113
Cacao Rose Bitters 116
Relaxing Herbal Smoke Blend 118
Schisandra Hibiscus Herbal Lollipops 120
Turmeric Crystal Macrame Plant Hanger 122
Crystal Massage Bar 126
Quartz Pendulum Necklace 129
What Are Crystals 133
Foraging 143
Natural Plant Dyes 150
Resources 151
About the Author 152
Acknowledgments 153
Index 154