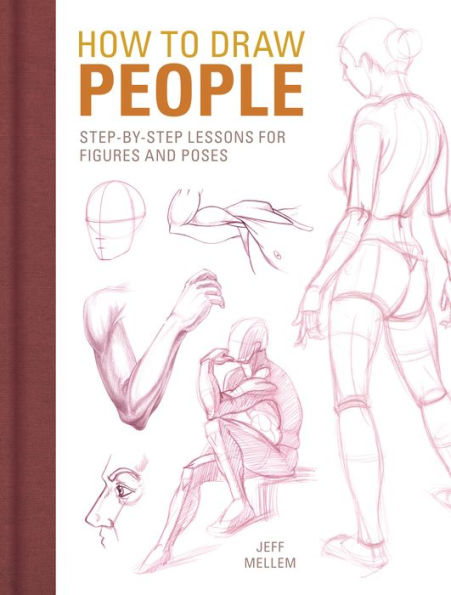
Read an Excerpt
CHAPTER 1
Level 1 Armature
The best way to learn to draw the human figure is to start as simple as possible. Forget about tracing contours. Forget about shadows and values. Forget about skin and bones and facial features. What you need to do is boil the figure down to its essence, something so simple that it can be drawn quickly, something so clear that there's no question about what it represents.
When people who don't know how to draw want to sketch a person, they often end up with a stick figure. That's about as simple as you can get. The problem with the standard stick figure is that it doesn't possess the information on which to base a drawing. However, with a couple of additions and modifications, you can turn a simple stick figure into a foundation for a drawing.
If you take a stick figure and add some shoulders and hips, you get something that looks a lot more like a human than the usual stick figure. If you also add in some hands and feet and some bends at the elbows and knees, some volume to the head and keep all the parts roughly in proportion to a real person, you'll end up with something that's both easy to draw and recognizable as a human. In art, this simplified figure is called an armature.
Learning to draw an armature is a great place to start in figure drawing because you don't have to worry about making it look like the person you're drawing. Once you take away all the details, what you're left with is a diagram of how someone is posed. By reducing the figure to this simple representation, you gain the power to analyze and exaggerate poses you see and invent poses you imagine.
One important note about drawing the armature: This is not gesture drawing. Gesture drawings are a better way to build a drawing because they show both the pose and the proportion of your figure (like an armature does) but also give your drawing a rhythm and flow. The armature is a more concrete, rigid system that hones your sense of proportion and is an easy and clear way to build a pose. Gesture drawing is discussed later in this chapter. For now, stick with the armature as a way to help you see beyond the surface of your subject.
Demonstration
Armature
1 Draw the Head
The first step in drawing an armature is to draw an oval for the head. I start with the head because it establishes the proportion for the rest of the body. Pay particular attention to the angle at which the head tips to the left or right.
When you draw your oval, you don't need to go around and around. Just draw an ellipse in single lines once around or so. It helps to practice drawing circles of various sizes and elongations until you can draw a simple oval shape consistently.
2 Draw the Face Map
Now, you must define how the head is tipping forward or backward. You have to think of your shape as a sphere and not a flat circle. A sphere has three dimensions, where as a circle has only two. I know the page is flat and your circle only has two dimensions, but you can make it appear to have depth simply by wrapping a line around the sphere's equator.
To see how this works in real life, wrap a rubber band around a ball or draw a line around the middle of a balloon. As you tip the ball or balloon away from you, the curve of the line appears to arch upward; if you tip it forward, the arch will appear to dip downward.
This line around the middle of the oval represents the eye line. The chin will fall at the bottom of the oval. The bottom of the nose is halfway in between the eye and the chin. The mouth is halfway between the nose line and the chin. You can add those lines if you want to show the direction and tilt of the head.
3 Add the Neck
You will want to add a line for the neck. This line generally represents the spine. Don't worry about anatomy yet; just have the line start at the back of the sphere opposite the face.
The neck bends and twists to a large degree, so be sure to give it some curvature. Even when a person is looking straight forward, you can see the natural curvature of the neck in profile.
Exercise
Stop here and practice ovals and spheres. Once you can draw them consistently, draw the centerline around the sphere. Then add the indicators for the chin, nose and mouth. Finally, add a neck line.
4 Draw the Torso
The next step is to work down the body to the feet. Draw a line that represents the torso. Like the neck, this line follows the general motion of the spine, but you're not trying to draw the curves of the spine itself. Don't worry about the outer curve of the spine at the rib cage or the inner curve at the waist. You're trying to capture the general movement of the torso down to the hips.
5 Add the Hips
On the armature, the hips are represented by a straight line that is at a 90-degree angle from the base of the spine. This makes it easy to figure out how to draw the hip line. Once you've drawn the torso line, the hip line will be perpendicular to it.
Facing forward, the hips are wider than the head, but as the body turns to the side, this line foreshortens and could be as small as a single point.
6 Draw the Legs
The legs should be about as long as the head, neck and torso combined (assuming the body isn't foreshortened), bending at the middle for the knee.
Add a simple line to indicate the direction of the feet and to anchor your figure on the ground.
7 Draw the Shoulders and Arms
Each shoulder moves independently, so they aren't represented by a straight line like the hips are. When the shoulders are shrugged or rotated forward, the shoulder line should reflect this with a curved line. The shoulder line connects to the torso at a right angle, similar to the hips, but it curves up, down, forward or back as it moves away from the body, according to the pose.
Add the arms and hand in a similar fashion to the legs and feet, only a little shorter.
Proportions
Once you're comfortable posing an armature, you'll need to start paying attention to getting the proportion correct. Every person is a little bit different. Some people have long legs and a short torso. Other people might have long arms or wide shoulders or a squat head, so you have a lot of leeway in drawing these things.
That said, the classical proportion of an adult is roughly seven and a half heads tall. The top of the head to the pubic area is four heads high. The legs are about three-and-a-half head lengths tall, but many people stretch them to a more statuesque four heads.
These proportions only matter when the figure is standing straight. As soon as a limb or the torso moves forward or backward, the foreshortened perspective makes the proportion seem shorter. If you're drawing from life, the easiest way to measure distances is to visually measure the height of the head using your pencil at arm's length. Then use that measurement to plot out the rest of the body. Eventually you'll develop a sense of how much the proportions change when foreshortened, which will help you when you're inventing a figure from imagination.
This armature is seven and a half heads tall. The horizontal lines show where different parts of the body fall when you use the height of the head to measure the proportions. For example, you can see that from the top of the head to the bottom of the torso is four heads tall. When a limb moves away from the body or is foreshortened, you can use the head as a reference to figure out where to start and end your lines.
Assignment 1
Use Photos to Draw an Armature
1| Gather Reference Photos
Gather several photos of people in motion. I recommend searching the Internet for images of athletes from nearly any sport or performers such as dancers, actors or acrobats. You can also find great dynamic action in movie stills, comic books and concept art for video games. Whatever piques your interest is what you should use. Print out at least ten images. (These will also be used in future exercises, so save them.)
2| Trace an Armature
Place tracing paper over the image and draw an armature of the pose. Use a light table if needed.
3| Draw Armatures
Once you can distill the armature from a pose by drawing on top of an image, you are ready to create armatures through observation. Use the photos you collected as references, but this time don't draw on top of the photo. Pay close attention to the size of the head compared to the body and the lengths of the limbs. Try to render the proportions as accurately as possible.
Extra Credit
Take your sketchbook to a place where people gather and try to re-create people's poses in armature form. I recommend you go somewhere people don't move around too much, such as a coffee shop. You can capture the poses of people standing in line, sitting at a table and interacting with other people. If you don't want to draw in public, draw from what you see in a movie or TV show.
Armature in Motion
A great way to practice the armature is to give it something to do. This armature is hoisting a heavy sack onto his shoulder. In each of the drawings, I had to consider how he would move and how he would stay balanced. It helps to act out the motion yourself before getting your armature to do the same motion on the page.
Exercise
Stop here and choose one of the armatures you drew from a reference. Picture in your mind the motion the person was going through when that image was captured. Act it out if you can. Now try to draw armatures that animate the motion before and after the moment you drew in the picture.
Gesture Drawing
The armature is good for analyzing the pose and clearly defining how the body is positioned. The biggest shortcoming of beginning a drawing with an armature is that it is rigid and slow to get down on paper. Gesture drawing is an even quicker way to convey the movement and flow of a pose while still clearly showing how the body is positioned. You need the skills of armature drawing even though you're not actually putting it down on paper.
Gesture drawing isn't about drawing a skeletal structure or the body's contours; it's about capturing the totality of the pose as one fluid drawing. That means you may mark the twist of the spine or the outside curve of the hips, but you're not thinking about those individual pieces as much as you are trying to capture the energy of the total pose. It still needs to give you all the positional information that the armature did, but it also needs to give you a feeling for the whole subject — not just how everything fits together but also the attitude and energy of the person you're drawing.
You can see the difference between the armature and the gesture in these two drawings of the same pose. Both show how the body is positioned and the proportion of the figure, but the gesture gives a sense of rhythm and flow. You may use a dark line to emphasize the stretch at the hip or the twist through the torso and lighter, smoother lines on a relaxed arm. These initial observations, recorded in your gesture drawing, will come through as the drawing develops and help to keep the energy and emotion through to the final rendering.
The fluid marks of a gesture drawing allow you to more easily make adjustments as you develop your drawing. It is also easier to integrate the gesture drawing into the more complex drawings you'll learn later. An armature is stiff, and the straight lines are more noticeable than the organic lines of a gesture drawing.
Demonstration
Gesture Drawing
1 Draw the Head and Face Map
As you did with the armature, start your gesture drawing with a circle for the head. Use an eye and face line to indicate the tip and orientation of the head.
2 Add the Neck and Shoulders
Use fluid lines to show the movement of the neck and shoulders.
3 Draw the Torso and Legs
Work your way down the body through the torso, hips, legs and feet. At this point, it should be clear that you're not drawing the armature but capturing the movement of the body. One line may represent the outside edge of the body. Another line may indicate a twist of the torso or how one body part flows into the next. You are not drawing any anatomical part of the body in particular. Instead, you're capturing a sense of the whole pose. You will still use the knowledge of proportion and your observation skills of the shifting body, shoulders and hips that you honed when drawing the armature.
4 Add the Arms and Hands, and Define
Go back up to the top and add the arms and hands.
If you'd like to define the body a little, you can add lines around the body similar to the one that shows the volume of the head. These lines can help show direction and volume of the body.
Gesture Examples
In the gesture drawings on this page you can see how some drawings emphasize one thing important to the pose, while other drawings hint at it or leave it off completely. For example, some drawings illustrate the hands more clearly because they're an important part of the figure's attitude, while they're de-emphasized in other drawings because they're not as important to the pose.
Exercise
Stop here and pull out the photos you chose when practicing the armature. This time practice drawing gestures. Remember to keep the drawings loose and free. Focus on capturing both the pose and the energy of the model. Notice how much faster a gesture drawing can be created than an armature.
Level Up Checklist
Before you move on to the next chapter you should master the basic skills highlighted in this chapter.
* Draw a simple circle, add an eye line around its circumference to make it a sphere and mark off the chin, nose and mouth.
* Render a figure as an armature in a variety of poses.
* Use the technique of gesture drawing to show the movement and flow of a figure.
CHAPTER 2
Level 2 Simplified Skeleton
Once you've mastered drawing the figure as an armature, you can expand on those skills to draw a simplified version of a skeleton. Think of the skeleton as the armature with more dimension. The line of the spine, the angle of the hips and shoulder and the positions of the arms are exactly the same as the armature. Now you'll add a spherical shape for the rib cage, a modified box for the pelvic area and some bony shapes for the limbs.
Remember, at this stage you don't need to worry about the anatomical accuracy of the bones. For now, just create something that has a little more three-dimensional volume than the armature. This will give you a greater understanding of the structure below the muscles. You can, of course, study the actual bones of the skeleton if you want your drawings to be more anatomically accurate, but at this stage it's not necessary.
Demonstration
Head and Neck
For your armature you used just a sphere to represent the head. Now you'll get a little closer to drawing an anatomical skull by drawing a simplified head shape based on the sphere.
There are two parts to this simplified skull: first, the cranial area, which is a wide sphere at the back of the head. Second, the face area joined to the cranium. It can be drawn as a second oblong sphere or as a squared-off mask attached at the front. The main thing to convey is that the face area is narrower and drops down from the cranial sphere.
The spine connects to the skull at the bottom of the cranium, near the back, and has a gentle backward curve.
1 Draw the Cranium
Start by drawing a wide sphere for the back mass of the head.
2 Add the Face
The face drops down from the cranium and is a little longer. Add in the centerline, and add marks for the nose and mouth.
3 Add the Neck
The neck connects to the cranium just behind the jaw. Instead of the line you'd see on an armature or gesture drawing, use a cylinder to give it dimension.
These heads are similar to the simple sphere heads in the Armature lesson (pages 10–11) except they are a bit closer to the real anatomical shape of the skull. The neck is now a cylindrical shape instead of just a line.
Demonstration
Rib Cage and Spine
What you're trying to accomplish with the simplified skeleton is a drawing that shows the volume of the underlying structure of the body. It's too easy to lose sight of the volume when you're focused on small details. This is especially true for the rib cage. If you start drawing the individual ribs, you'll likely lose sight of the three-dimensional shape of the rib cage as a whole.
So forget about each individual rib and draw the rib cage as an egg shape.
1 Draw the Rib Cage Shape
The rib cage is narrower at the top than you probably realize because when you look at a person you see the muscles of the chest and back squaring off the shoulders. When you look at a skeleton, you realize how narrow the rib cage gets at the top to make room for the clavicle and scapula. Remember, even though this looks like a circle on the page, you need to think of it as a three-dimensional shape, like an egg.
2 Add Anatomy
When you draw the shape of the rib cage's arch consider how you would draw on top of a three-dimensional shape. It's similar to drawing the eye line on the armature face map, but it curves around the shape.
3 Add the Neck
Draw a hole in the top front of the form for the opening of the neck.
4 Draw the Spine
Once you have a handle on drawing the rib cage as an egg shape, you can enhance the form to look more like the actual shape of the rib cage. The spine runs through the back of the rib cage. Practice drawing the rib cage and the spine from all different angles.
(Continues…)
Excerpted from "How to Draw People"
by .
Copyright © 2018 Jeff Mellem.
Excerpted by permission of F+W Media, Inc..
All rights reserved. No part of this excerpt may be reproduced or reprinted without permission in writing from the publisher.
Excerpts are provided by Dial-A-Book Inc. solely for the personal use of visitors to this web site.