

Paperback
-
PICK UP IN STORECheck Availability at Nearby Stores
Available within 2 business hours
Related collections and offers
Overview
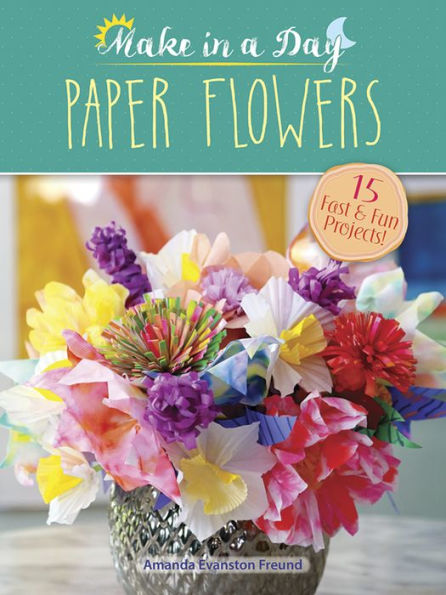
These colorful blooms will brighten any room — and best of all, you can make them in a day! You'll find that it's a cinch to add a spring-like air to any room with a bouquet of daffodils, a cluster of hyacinths, or a vivid bunch of favorite blossoms, and no previous experience is necessary.
Each book in Dover's Make in a Day series presents 15 projects with illustrated step-by-step instructions. The beginner-friendly projects are ideal for anyone wishing to whip up something simple but special. Creating paper flowers adds a personal touch and a dash of handmade charm. Supplies are easy to obtain and readily available at major craft stores. Other titles in the series include Make in a Day: Modern Wreaths and Make in a Day: Pompom Crafts.

Product Details
| ISBN-13: | 9780486810867 |
|---|---|
| Publisher: | Dover Publications |
| Publication date: | 10/19/2016 |
| Series: | Dover Crafts: Origami & Papercrafts |
| Pages: | 64 |
| Sales rank: | 593,294 |
| Product dimensions: | 8.25(w) x 11.00(h) x (d) |
About the Author
Read an Excerpt
Paper Flowers
By Amanda Evanston Freund
Dover Publications, Inc.
Copyright © 2016 Amanda Evanston FreundAll rights reserved.
ISBN: 978-0-486-81086-7
CHAPTER 1
Hyacinths
The quintessential harbinger of spring, hyacinth bulbs bloom when the ground is still cold from winter frost and fade before Easter, not to be seen again for another year. Their moment to shine is far too brief! Although this project cannot replace the hyacinth's delicious scent, you can turn out dozens of these blooms in a single afternoon.
To make the hyacinths, you will need:
* Tissue paper
* Scissors
* Drinking straws
* Masking tape
Note
Each flower will require one piece of 3" x 36" tissue paper and one drinking straw.
1 Cut one strip of tissue paper, roughly 3" x 36" long, and fold in half lengthwise.
2 Fold in quarters and fringe the longest folded edge with scissors. Smooth flat when finished, keeping the folded edge intact.
3 Secure one end of tissue paper to the top 1" of a straw with a small piece of masking tape.
4 Roll the tissue diagonally down the length of the straw, gently pushing it upward on occasion until the flower is approximately 6" tall.
5 Secure the end of the fringed flower with masking tape and continue to wrap the masking tape downward.
CHAPTER 2Dandelions
Some people think dandelions are weeds but that's just a matter of perspective; they are wildflowers. They are cheerful. They are functional. They grow wherever they please. They aren't waiting for permission to grow. They don't need a greenhouse. They survive. They seed. They share. Interesting fact: the name dandelion comes from the shape of the leaves — lions teeth. In France, they are called pis-en-lit, which roughly translates to "wet the bed." If you have ever had dandelion tea before bed, you'll know where that expression comes from!
To make the dandelions, you will need:
* Tissue paper
* Scissors
* Drinking straws
* Masking tape
Note
Each flower will require three pieces of 6" x 36" tissue paper.
1 Cut three sheets of tissue paper into three strips, roughly 6" x 36" long All three sheets need to be the exact same size.
2 Fold in half, lengthwise.
3 Fringe the folded edge of the tissue paper with scissors.
4 Fold the long strip in half, keeping the fringe intact.
5 Fold again and position the strips so the bottom edge of all the layers is exposed slightly.
6 Lay a 12" piece of masking tape across the base of the tissue and smooth with your fingers.
7 Snip off the folded tips of the fringe.
8 Attach the end of the masking tape to the tip of a drinking straw.
9 Roll the straw down the length of the masking tape; continue to roll the masking tape down the top third of the straw.
10 Flip over and fluff the petals with your fingers.
CHAPTER 3Hydrangeos
In nature, hydrangea flowers can grow as large as a head of cauliflower, with each flower composed of hundreds of smaller blooms in varying shades of color. Here we are re-creating the traditional blue on periwinkle hydrangea that is so beloved but difficult to grow at home. With this project, you can create hydrangeas in any color your heart desires.
To make the hydrangeas, you will need:
* Tissue paper in two similar color tones
* White tacky glue
* Drinking straws
* Scissors
* Masking tape
* Marker
* Scrap paper
Note
Each flower will require 20 circular tissue pieces for the petals.
1 Cut tissue paper into five 4" squares and fold all five pieces into quarters.
2 Use scissors to cut circles; this should yield twenty 2" circles.
3 rumple one 4" square piece of tissue into a loose ball.
4 Wrap the ball with another 4piece of tissue.
5 Use a 5" piece of masking tape to attach the ball to the top of the drinking straw. Wrap tightly.
6 Squeeze a tablespoon of glue onto a piece of scrap paper.
7 Pull the center of one piece of tissue over the blunt end of a thick marker.
8 Dip the tissue gently into the glue, still holding it over the end of the marker.
9 Use the marker to tap the tissue circles onto the ball, starting toward the bottom of the ball.
10 Working from the bottom up, repeat Step 9, continuing to add tissue pieces as you go. Twenty circles will cover the sphere nicely, but feel free to add texture with additional circles or add a second layer, alternating colors as you go.
CHAPTER 4Snapdragons
Growing taller than most flowers, snapdragons stand proudly vertical above the rest. With their giraffe-like proportions, it is interesting that they were named for dragons because when an individual blossom is squeezed, it opens and closes its mouth like a dragon. Oh snap! Unfortunately, these tissue paper blooms do not open and close their mouths, but they sure do make for a stunning display!
To make the snapdragons, you will need:
* Crepe paper streamers
* Tissue paper similar in color to the crepe paper streamers
* White tacky glue
* Drinking straw or small dowel
* Masking tape
* Scissors
Note
Each flower stalk will require at least 15 blossoms. If you don't have an extra long drinking straw, tape two straws together or use a wooden dowel. Masking tape that has been sliced to less than %" thick will be especially useful for this project.
1 Fold a 30" piece of streamer repeatedly until it is 3" long. Fringe one edge of the streamer with scissors leaving the opposite edge intact.
2 Unfold the long strip and slice into 2" pieces.
3 Pinch the non-fringed side of the streamer and twist.
4 Layer multiple sheets of tissue paper and trace 2", 3", and 4" circles. Keeping multiple sheets of tissue stacked, cut out the circles. The end goal is to cut out at least 15 circles of varying sizes.
5 Squeeze several small dots of glue in the center of one circle.
6 Insert the tuft of fringed streamer into the center of a tissue circle and pinch.
7 Repeat gluing, inserting, and pinching until at least 15 blossoms are made.
8 Wrap the entire length of a straw with masking tape.
9 Starting at the top, adhere masking tape to the straw, spiraling from top to bottom while inserting blossoms along the way. Insert smaller blossoms toward the top, larger blossoms at the bottom.
CHAPTER 5Camellias
Beloved by fashion designer Coco Chanel, the camellia has long stood as an icon of high-end design. Here it is again, reinterpreted in paper, in a deceptively simple craft project. Use a camellia as a gift topper, birthday badge, or refrigerator magnet, or make dozens to go around a wreath.
To make the camellias, you will need:
* Tissue paper in two colors (or more)
* White tacky glue
* Scissors
Note
Each camellia requires six large and two small circles of tissue paper.
This project can easily be upsized by doubling the size and quantity of the circles.
1 Fold large sheets of tissue paper and trace two different-sized circles on the top sheet.
2 Cut out circles. You will want six large circles and two small circles per flower.
3 With the exception of one small circle for each of the flowers, add two or three dots of glue toward the center of each of the circles; try to avoid placing the glue in the exact center.
4 Layer all the larger circles on top of each other, with a few slightly off-center for added dimension. Follow with the smaller circles.
5 Add the final (unglued) small circle to the top of the circles.
6 Allow the glue to dry at least 30 minutes.
7 Pull the topmost circle upward, rumpling the edges toward the center, then follow with the other small circles.
8 Pinch the larger circles up slightly, one by one, ruffling the edges as needed.
9 Secure to a pin back or a magnet, or tie to the top of a special gift.
CHAPTER 6Teacup Roses
Named for the cup-like bowl that surrounds their intensely ruffled inner blooms, teacup-style roses are beloved by traditional English garden enthusiasts all over the world. Their blossoms can often be found etched in the borders of vintage dishes and tablewear — and with this project you can make a centerpiece to match!
To make the teacup roses, you will need:
* Coffee filters pre-dyed and dried (see page 60)
* Tissue paper similar in color to the coffee filters
* Drinking straws
* Masking tape
* Scissors
Note
Each rose will require six coffee filters and one 6" x 36" piece of tissue paper.
1 Pinch one filter in the direct center, forming a gentle cone shape. Set aside.
2 Continue to pinch filters until you have the desired quantity (six filters per rose).
3 Lay a 6" piece of masking tape and attach it to the top 1" of a drinking straw. One by one, add the tips of the coffee filters to the tape, sticking as you go. Leave at least 2" of exposed tape at the end.
4 Roll the straw across the filters tightly.
5 Wrap the remaining tape around the bundle and secure as tightly as possible.
6 Accordion fold one piece of 6" x 36" tissue paper. Curve off one end with your scissors.
7 Unfold the tissue; you will have a scalloped edge.
8 Secure the tissue to the top of the straw using masking tape, aiming to have the tops of the scallops just slightly higher than the edges of the coffee filters.
9 Gently roll the tissue around the bundle of coffee filters.
10 Tightly wrap the base of the tissue with masking tape. Continue down the straw if desired.
CHAPTER 7Water Lilies
They say you have never truly lived until you have been to Paris. We can conjure up some Parisian flair with a nod to a work by the city's favorite son — Claude Monet, and his water lilies. Scattered across a table or on top of a simple gift, these water lilies add a festive touch!
To make the water lilies, you will need:
* Extra large baking cups
* Tissue paper
* White tacky glue
* Scissors
Note
Each flower will require five baking cups and two circles of tissue paper. If extra large baking cups are not available, you can supersize this project using plain white coffee filters. Using very small amounts of fast-drying, extra thick white glue will prove very helpful for this project.
1 Fold two 4" squares of tissue paper into quarters and round off the corner to create a circle.
2 Fringe the circle along the edge, leaving the center intact.
3 Unfold the circles and separate the edges.
4 Stack five baking cups and fold three times into eighths.
5 Use scissors to cut a rounded point into the outer edge.
6 Unfold the baking cups to reveal an eight-point flower.
7 Pull the baking cups apart and squeeze four small dots of glue into the center of one baking cup. Press the bottom of another baking cup onto the glue dots. Repeat with all five baking cups, alternating petal points as you go.
8 Squeeze more glue dots to attach the two fringed circles to the center of the baking cups and allow the glue to firm up, at least 15 minutes.
9 Gently pull the two fringed circles upward, pinching slightly at the base.
10 Continue to pull the other layers upward making the flower as full and fluffy as possible.
CHAPTER 8Clematis
The clematis is a vine flower popular all over the world for its hardy nature and showy blooms. For this project, you can enjoy a single stem in a simple vase, or scatter a handful across a table or up a winding reed. Paper flowers like this make it easy to enjoy clematis from the comfort of home.
To make the clematis, you will need:
* Tissue paper
* Crepe paper streamers
* Drinking straws
* Masking tape
* Scissors
Note
Each flower will require three 6" squares of tissue paper.
1 Cut a 16" piece of streamer, fold in quarters, and fringe the long edge with scissors, leaving the bottom ½" intact.
2 Use a 2" piece of tape to attach one end of the streamer to the top of a drinking straw.
3 Roll the streamer around the end of the straw and secure with another small piece of tape.
4 Stack three 6" square pieces of tissue paper and fold into quarters. Use scissors to cut loose petal shapes around the edge.
5 Unfold the flower and snip an incision in the center slightly larger than the width of the drinking straw.
6 Open and flatten the flowers.
7 Insert the bottom of the straw through the incision in the center of the flower and gently pull toward the top. Repeat with the other two tissue flowers and bundle loosely. Use masking tape to tightly wrap the bottom base of the flower.
8 Continue to wrap the straw to make the stem.
9 Pull back the petals to shape your flower.
CHAPTER 9Color-Splotched Dahlias
The national flower of Mexico, the dahlia was discovered by the Aztec Indians centuries ago. First appreciated for their medicinal purposes, dahlias were later cultivated for their appearance, eventually morphing into every shape, color, and size imaginable. Some dahlias grow stout and spherical, while others bloom wide and flat — as large as dinner plates! Their variety is only surpassed by their beauty, so it is appropriate that this project capitalizes on the limitless possibilities of tie dye. No two of these blooms will ever be alike!
To make the color-splotched dahlias, you will need:
* Coffee filters
* Pipe cleaners
* Tissue paper
* Drinking straws
* Watercolor paints
* Paintbrush
Note
Each flower will require four coffee filters and one drinking straw. Some brands of coffee filters will be extra starchy and the watercolor will not sink through all four layers — the easiest remedy for this is to dip the stack of filters in water first, then wring out the excess moisture before painting.
1 Separate coffee filters into stacks of four and paint with dabbles of watercolor paint. Dry thoroughly. The watercolor should dye all four coffee filters. Take the stack of four filters and fold into quarters.
2 Cut four to six finger-like petals along the edge of the filters.
3 Gently pull apart the flowers.
4 Stack three 4" squares of tissue paper and fold into quarters. Round off one corner with scissors.
5 Fringe around the edge unfold
6 Fold one pipe cleaner in half and poke the pointed ends through the center of one of the tissue paper circles, with the two holes set 1" apart. Repeat with the other two pieces of tissue paper.
7 Poke the ends of the pipe cleaner through the center of one coffee filter with the two holes set 1" apart. Repeat with the other three coffee filters. Pull all of the coffee filters upward and bundle loosely.
8 Use a 4" piece of masking tape to tightly wrap the base of the flower as well as the top of the folded pipe cleaner.
9 Insert the pipe cleaner into a drinking straw and wrap both the straw and flower base with one continuous piece of masking tape.
CHAPTER 10Technicolor Chrysanthemums
Leftover artwork is the thorn in the side for artists of all ages. And as any parent of young children can tell you, the refrigerator art gallery is short on real estate and high in demand. So what do you do with all that leftover artwork? Turn it into flowers, either to be given away or collected and displayed lovingly at home. This project breathes life into paper goods that would often go unnoticed at the bottom of a drawer and turns them into something worth celebrating!
To make the Technicolor chrysanthemums, you will need:
* Painted paper artwork
* Drinking straws
* Scissors
* Masking tape
Note
Each flower will require one piece of paper, any size. If the art piece is single-sided, you may want to consider using a marker or crayon to create a simple pattern on the underside before creating the flower.
1 Cut the art piece in half, lengthwise.
2 Stack both pieces of paper, front side up, and fold in half, lengthwise.
3 Use scissors to fringe the edges.
4 Lay the two long pieces side by side and secure them to each other with a piece of masking tape.
5 Attach the bottom ½" of the strip to the top ½" of the straw with a small piece of masking tape.
6 Roll the straw along the length of the masking tape, keeping the paper in a neat and level line.
7 Secure the end of the strip with a 5" piece of masking tape and continue to wrap along the base and onto the top of the drinking straw.
8 Gently pull back the petals, starting at the outermost layers, spiraling toward the center.
9 Gently fluff the petals.
(Continues...)
Excerpted from Paper Flowers by Amanda Evanston Freund. Copyright © 2016 Amanda Evanston Freund. Excerpted by permission of Dover Publications, Inc..
All rights reserved. No part of this excerpt may be reproduced or reprinted without permission in writing from the publisher.
Excerpts are provided by Dial-A-Book Inc. solely for the personal use of visitors to this web site.
Table of Contents
Contents
Hyacinths, 1,Dandelions, 4,
Hydrangeas, 8,
Snapdragons, 12,
Camellias, 16,
Teacup Roses, 20,
Water Lilies, 24,
Clematis, 28,
Color-Splotched Dahlias, 32,
Technicolor Chrysanthemums, 36,
Roses, 40,
Daffodils, 44,
Tie-Dyed Tulips, 48,
Poppies, 52,
Peonies, 56,
How to Dye, 60,