
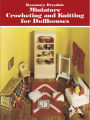


eBook
Available on Compatible NOOK devices, the free NOOK App and in My Digital Library.
Related collections and offers
Overview
With the right needles, hooks, yarns, and this book, you can create dozens of exquisite items for your dollhouse that take almost no time at all to complete. Rosemary Drysdale's extensive collection of 40 Lilliputian-size projects contains designs that are easy to execute, require very little yarn, thread, or floss, and are available nowhere else.
Full crochet and knitting instructions are clearly detailed in an easy-to-follow format. Helpful photographs of the completed piece accompany each project to guide you in your work, in addition to instructional diagrams which explain techniques and stitch variations. An added feature — totally unique to this publication — is the special section on switchable yarns that tells you which yarns and flosses are interchangeable.
Here are just some of the lovely dollhouse miniatures that you can make: Lacy Tablecloth; Welcome Mat; Ecru Doilies; Shell Bedspread; Oval Dining Room Rug; Lace Curtains; Bolster Pillows; Table Runner; Gingham Kitchen Set; Floor Pillow; Double Drapes; Granny's Kitchen Mat; Granny Square; Afghan Canopy; Bed Set; Scatter Rugs.
Specific colors are listed for each project, but the colors are only suggestions. Use your imagination to create color schemes that will best enhance your dollhouse and its furnishings.

Product Details
| ISBN-13: | 9780486152578 |
|---|---|
| Publisher: | Dover Publications |
| Publication date: | 03/29/2012 |
| Series: | Dover Crafts: Dolls & Toys |
| Sold by: | Barnes & Noble |
| Format: | eBook |
| Pages: | 48 |
| File size: | 7 MB |
Read an Excerpt
Miniature Crocheting and Knitting for Dollhouses
By Rosemary Drysdale, Linda Macho
Dover Publications, Inc.
Copyright © 1981 Dover Publications, Inc.All rights reserved.
ISBN: 978-0-486-15257-8
CHAPTER 1
Crocheting for Dollhouses
How to Crochet
SLIP KNOT: Grasp the loose end of the yarn with your left hand and make an "O" with the yarn leading from the ball (the ball of yarn should be hanging behind the "O"). Pinch the top of the "O" between the thumb and middle finger of your left hand, and hold your crochet hook in your right hand as you would hold a pencil. Insert the tip of the hook and bring a loop from the yarn ball through the "O" (A1). Tighten the loop to complete the slip knot (A2). You are now ready to make your first chain stitch (the loop on your hook never counts when you are counting the stitches in your work).
CHAIN STITCH: Pinch the base of the slip knot between the thumb and middle finger of your left hand, and wind the yarn from the ball over your forefinger. With the crochet hook inserted in the slip knot and the tip of the hook curved toward you, wrap the yarn around the hook from back to front (B1)—this is called a yarn over. Pull the yarn through the loop on the hook to complete the first chain stitch. Yarn over again and pull through the loop on the hook the number of times specified (B2). Each chain (and later each single crochet stitch) forms a distinct oval that can be clearly seen from the top of the work.
Counting the Chain Stitches: A loop is always on the hook when a stitch has been completed—just like the slip knot in the beginning. The loop on the hook is considered the beginning of each succeeding stitch, therefore it does not count as a stitch. In a row of chain stitches, the chain stitch immediately before the loop is the first stitch from the hook (C). The chain stitch preceeding that one is the second stitch from the hook and so on.
SLIP STITCH: Insert hook in a stitch, yarn over and then pull yarn through both the stitch and the loop on the hook in one motion (D). Slip stitch is similar to single crochet, but you do not yarn-over again before pulling the yarn through the loop on the hook.
SINGLE CROCHET: Make a foundation chain of the required number of stitches (remember that the loop on the hook does not count as a stitch). Insert the hook in the second chain from the hook—the center of the oval (E1), yarn over and pull the loop through the stitch. You now have two loops on the hook (E2). Yarn over again (E3) and pull yarn through both loops on the hook to complete the first single crochet stitch (E4). Repeat until you have worked one single crochet stitch in each stitch of the foundation chain. Unless the pattern instructions specify otherwise, at the end of the first row and of each succeeding row, make one chain stitch (E5), and then turn the work so the yarn from the ball is once again at the right edge. For succeeding rows of single crochet, unless the instructions specifically tell you to do otherwise, always make the first stitch of a row in the last single crochet stitch of the previous row (not in the turning chain), and work each stitch by inserting the hook under both strands that form the oval of the stitch on the previous row (E6).
HALF DOUBLE CROCHET: Wrap the yarn over the hook and insert into the third chain from the hook (F1). Yarn over and draw through the chain—three loops on the hook (F2). Yarn over and draw through all three loops to complete the first half double crochet stitch (F3). Work a half double crochet in each chain across. At the end of the row, chain two and turn.
DOUBLE CROCHET: Wrap the yarn over the hook and insert into the fourth chain from the hook (G1). Yarn over and draw through the chain—three loops on the hook (G2). Yarn over and draw through the first two loops on the hook (G3). Yarn over and draw through the remaining two loops on the hook to complete the first double crochet (G4). When you have worked a double crochet in each chain across, chain three and turn work. In most cases, the turning chain counts as the first double crochet of the next row. When working the second row, skip the first stitch and work a double crochet in the two top loops of each double crochet across. The last double crochet of each row is worked in the top chain of the turning chain.
TREBLE OR TRIPLE CROCHET: Wrap the yarn twice over the hook and insert into the fifth chain from the hook. Yarn over and draw through the chain—four loops on hook (H). Yarn over and draw through two loops on hook, yarn over and draw through two more loops on hook, yarn over and draw through remaining two loops on hook to complete the first treble crochet. Work to the end of the row, chain four and turn; chain four counts as the first treble of the next row.
GAUGE: A crocheted fabric is measured by counting the number of stitches to the inch which gives the width measurement, and by counting the number of rows to the inch which gives the depth measurement. Always test your own gauge before beginning a project. To do this, chain 20, using the yarn and hook specified, and work in the pattern stitch for about 3". Then measure how many stitches and rows you made per inch. If your swatch has more stitches and rows per inch than the number specified in the gauge, your work is too tight and you should use a larger crochet hook. If you have fewer stitches and rows per inch than the gauge, your work is too loose and you should switch to a smaller hook. Note: For projects where a gauge is not given, work with the yarn and hook specified.
INCREASING AND DECREASING: To increase one stitch, work two crochet stitches in the same stitch of the previous row.
To decrease one crochet stitch, work two stitches together in the following way: work the first stitch until the final yarn over, but do not yarn over; instead, begin to work the next stitch, working it also to the final yarn over; now yarn over and pull the yarn through all loops on the hook.
ATTACHING NEW YARN: If you run out of yarn or must add a new color in the course of working a piece, hold the new yarn against the wrong side of the work (this will always be the back of the piece unless the pattern instructions specifically indicate otherwise), leaving a loose 4" end. Insert hook into the next stitch to be worked, yarn over and draw a loop of the new yarn through the stitch. Then finish the stitch and continue working in the usual manner, using the new yarn. Work the yarn ends into the backs of the next few stitches or, if you prefer, let them hang at the back of the work and weave them in later.
FASTENING OFF: Complete the last stitch of the piece and cut the yarn from the ball, leaving a 4? yarn end. Then draw the yarn end through the remaining loop on the hook and pull tight. Thread the yarn end on a tapestry needle, weave it through the back of the work for about 1?, and trim the excess.
JOINING CROCHETED PIECES: Pin or hold the pieces together with the edges even. Thread a large-eyed needle with matching yarn, and work an overcast stitch through the loops of each pair of matching stitches. Sew through the inner loops only if you want to produce parallel lines on the front of the work (J1). Sew through the outer loops only if you want the parallel lines to appear on the reverse side of the work (J2).
CROCHET ABBREVIATIONS
ch—chain
dc—double crochet
dec—decrease
fs—fan stitch
hdc—half double crochet
inc—increase
lp, lps—loop, loops
pat—pattern
rep—repeat
rnd—round
sc—single crochet
sp—space
ss—slip stitch
st, sts—stitch,stitches
tog—together
tr—treble crochet
yo—yarn over
Petal Tablecloth
SIZE: About 6" diameter.
MATERIALS: (Betting Lily) Daisy Mercerized Crochet Cotton No. 30, ecru. Steel crochet hook #10, or any size hook which will give the stitch gauge below.
GAUGE: 5 tr = 3/8".
DIRECTIONS: Starting in center, ch 10, join with ss to form ring.
Rnd 1: Ch 3, 27 dc in ring, join with ss to top of third ch.
Rnd 2: Ch 5, * tr in next st, ch 1. Rep from * around (27 tr), join to fourth ch of ch 5.
Rnd 3: Ss in next sp, sc in same sp, * ch 4, sc in next sp. Rep from * around, join with ss to first ss.
Rnd 4: Ss to center of ch 4 lp, sc in same lp, * ch 4, sc in next ch 4 lp. Rep from * around, join with ss to first ss.
Rnd 5: Rep Rnd 4.
Rnd 6: Rep Rnd 4.
Rnd 7: Ss to center of next ch 4 lp, ch 4. Holding the last st of each tr back on hook, make 2 tr in same lp, yo and draw through all sts on hook (cluster made), * ch 6, sc in fourth ch from hook (picot made), ch 2, make a 3 tr cluster in next lp. Rep from * around, join to top of ch 4.
Rnd 8: Ss to center of next picot, ss in picot, ch 4, then work 4 tr in same picot, * ch 2, 5 tr in next picot. Rep from * around, join with ss to fourth ch.
Rnd 9: Ch 4, work 4 tr cluster over next 4 tr, * ch 7, sc in fourth ch from hook (picot made), ch 2, work a 5 tr cluster over the next 5 tr. Rep from * around, join to top of last cluster.
Rnd 10: Ss to center of next picot, ss in picot, ch 4, then work 2 tr cluster in same picot, * ch 7, sc in fourth ch from hook (picot made), ch 2, work a 3 tr cluster in next picot. Rep from * around, join with ss to top of cluster.
Rnd 11: Ss to center of next picot, ch 4, work 4 tr in same picot, * ch 3, 5 tr in next picot. Rep from * around, join with ss to fourth ch.
Rnd 12: Ch 4, * work 3 tr cluster over next 4 tr, ss over ch 3 to next tr, ch 4 in tr. Rep from * around. Fasten off. Block to measurement.
Lacy Tablecloth
SIZE: About 6" diameter.
MATERIALS:DMC Cordonnet Spécial #30, white.
Steel crochet hook #11.
GAUGE: 5 dc cluster = ¼".
DIRECTIONS: Ch 10, join with ss to form ring.
Rnd 1: Ch 1, 24 sc in ring, ss to first sc.
Rnd 2: Ch 3, dc in next sc, [ch 3, dc in each of next 2 sc] 11 times, ch 3, ss to top of ch 3.
Rnd 3: Ss in first dc and in ch 3 sp, ch 1, sc in sp, [ch 4, sc in next sp] 11 times, ch 4, ss in first sc.
Rnd 4: Ss in first sp, ch 3, holding back on hook the last lp of each dc, work 4 dc in sp, yo and through all lps on hook (cluster st made), ch 5, 5 dc cluster in same sp, * ch 5, [5 dc cluster, ch 5, 5 dc cluster] once in next sp, ch 5. Rep from * around, ending ch 5, ss to top of first cluster (19 ch 5 lps made).
Rnd 5: Ss to center of first lp, ch 1, sc in sp, ch 5, sc in center of next sp. Rep from * around, ss in first ss (19 lps made).
Rnds 6-12: Rep Rnd 5, working ch quite loosely.
Rnd 13: Ch 1, work 7 sc in each ch 5 lp all around, join with ss to first sc.
Rnd 14: Ch 4, dc in next sc, * ch 1, skip 1 sc, 1 dc in next sc.
Rep from * around. Ch 1, join with ss to third ch of first ch 4.
Rnd 15: Ss into next ch 1 sp, ch 1, sc in same sp, * ch 2, skip 1 ch 1 sp, in next sp work [2 dc, ch 3, 2 dc] once, ch 2, skip 1 ch 1 sp, sc in next sp. Rep from * around, ending ch 2, ss in first sc.
Rnd 16: * Ch 2, [2 dc, ch 3, 2 dc] once in next ch 3 sp, ch 2, sc in next sc. Rep from * around.
Rnd 17: Rep Rnd 16, working ch 3 instead of ch 2. Fasten off. Block to measurement.
Granny's Kitchen Mat
SIZE: About 6" square.
MATERIALS:Pingouin fil d'écosse No. 5, sable. Or for a coarse texture, small ball of linen yarn. Steel crochet hook #3. Large-eyed needle.
GAUGE: 3 dc = 3/8"; first rnd = 7/8" square.
DIRECTIONS: Make 4 squares as follows: Starting in center, ch 4, join with ss to form ring.
Rnd 1: Ch 3, 2 dc in ring, [ch 3, 3 dc in ring] 3 times. Ch 3, ss to top of first ch 3.
Rnd 2: Ss to next ch 3 corner sp, ch 3, 2 dc, ch 3, 3 dc in same sp. * Ch 1, 3 dc, ch 3, 3 dc in next corner sp. Rep from * twice more. Ch 1, ss to top of first ch 3.
Rnd 3: Ss to next ch 3 corner sp, ch 3, 2 dc, ch 3, 3 dc in same sp. * Ch 1, 3 dc in ch 1 sp, ch 1, 3 dc, ch 3, 3 dc in next corner sp. Rep from * twice more. Ch 1, 3 dc in next ch 1 sp, ch 1, ss to top of first ch 3.
Rnd 4: Ss to next ch 3 corner sp, ch 3, 2 dc, ch 3, 3 dc in same sp. * [3 dc in next ch 1 sp] twice, 3 dc, ch 3, 3 dc in next corner sp. Rep from * twice more. [3 dc in next ch 1 sp] twice, ss to top of first ch 3. Fasten off.
Finishing: Sew 4 squares tog through back lps only to form a square.
Edging: Dc in each dc around, working 3 dc, ch 3, 3 dc in each corner sp, and 1 dc where squares are joined. Fasten off. Press flat.
Oval Dining Room Rug
SIZE: About 5¼" x 7".
MATERIALS:Bernat® Cassino® Mercerized Cotton, 150 gram ball each, geranium and black. Steel crochet hook #2, or any size hook which will give the stitch gauge below.
GAUGE: Using 2 strands, 7 sc = 1".
DIRECTIONS: Work with 2 strands of Cassino throughout. Starting with geranium in center, ch 12.
Rnd 1: Sc in second ch from hook and in each ch across to within last ch, work 3 sc in last ch. Continue to sc along other edge of ch to within last ch, work 3 sc in last ch.
Rnd 2: Sc in each sc of previous rnd; inc evenly at each end of oval to keep work flat (to inc, work 2 or 3 sc in 1 sc as necessary).
Rnds 3–4: Rep Rnd 2. Fasten off geranium; attach black.
Rnds 5–7: Rep Rnd 2. Join with ss at end of Rnd 7.
Rnd 8: Ch 3, dc in each sc around, inc evenly as necessary to keep work flat, join with ss at end. Fasten off black.
Rnd 9: Attach geranium. Ch 3, work dc in each dc of previous rnd, inc evenly all around as necessary. Join with ss at end. Fasten off geranium.
Rnds 10–11: Attach black. Ch 3, work dc in each dc of previous rnd, inc evenly all around. Join with ss at end of Rnd 11. Fasten off black.
Rnd 12: Rep Rnd 9. Press flat.
Gingham Kitchen Set
SIZES: See individual directions.
MATERIALS: Gingham with 1/8" checks, red and white, ¼ yard. DMC Pearl Cotton #8, 1 ball each: red, white. Steel crochet hook #11. Sewing needle. Scissors. Compass. Iron. Thread.
DIRECTIONS: Tablecloth (5½" diameter): Use a compass to mark a 5"-diameter circle on gingham; cut out on marked line. Attach red with ss to raw edge of fabric.
Rnd 1: Sc, ch 1 evenly all around raw edge of fabric; join with ss (about 104 sc).
Rnd 2: Ch 4, sc in each ch 1 sp all around, join with ss. Break off red. Attach white to any ch 1 sp.
Rnd 3: Ch 4, sc in next ch 1 sp all around to make loops, join with ss. Fasten off. Press flat.
Curtains (About 3¼"x5½"): Cut 2 rectangles of gingham, each 3" X 5". With ss, attach red ¾" from beg of 1 long edge of 1 piece.
Rnd 1: Sc, ch 1 along 1 long edge (about 33 sc). Sc, ch 1, sc, ch 1, sc in corner. Sc, ch 1 along short edge (about 15 sc). Work second corner as for first, then work second long edge as for first, finishing ¾" from top edge. Turn.
Rnd 2: Ch 4, sc in ch 1 sp along 1 long side and 1 short side. Fasten off red. Attach white to first red ch 4 loop.
Rnd 3: Ch 4, sc in ch 4 loop along 1 long and 1 short side. Fasten off.
Press ¾" raw edge 3/8" to wrong side of curtain twice, making 3/8" hem; slip-stitch in place with matching thread. Rep for second curtain, working Rnds 2–3 along opposite edges from those on first curtain.
Valence (About 4¼" x 1¼"): Cut 4" x 1" rectangle of gingham. With ss, attach red to corner of 1 long edge.
Rnd 1: * Sc, ch 1 evenly along 1 long edge (about 28 sc). Sc, ch 1, sc, ch 1, sc in corner. Sc, ch 1 along short edge (3 sc). Work second corner as for first. Rep from * around to work second long and short edges and corners.
Rnd 2: Ch 4, sc in ch 1 sp along 1 long edge. Break off red and attach white to first red ch 4 loop.
Rnd 3: Ch 4, sc in ch 4 loop all across. Fasten off.
Napkins (About 1¼" square): Cut 2 pieces of gingham, each 1¼" square. With ss, attach red to corner of 1 piece. Sc, ch 1 evenly along 1 edge (6 sc). Work 3 sc in corner, then rep for all other edges. Fasten off. Make second napkin same as for first.
Tea Cozy (About 1½" X 1"): Front: With red, ch 22.
Row 1: Dc in fourth ch from hook and in each ch across, ch 3, turn (18 dc).
Rows 2–3: Skip first dc (ch 3 counts as first dc), dc in each dc across, ending with dc in top of turning ch, ch 3, turn.
Row 4 (Dec row): Skip first dc, * [yo, pull up loop in next st, yo, pull through 2 loops] twice; yo, pull through 3 loops on hook (1 dc dec). Rep from * across row, ending with dc in top of turning ch, ch 3, turn.
Row 5: Rep Row 4, ending with ss in top of turning ch. Fasten off.
Back: Work same as for front.
Finishing: Using white, sc front and back tog around curved edges, leaving bottom edge open; work a ch 7 loop at center top.
(Continues...)
Excerpted from Miniature Crocheting and Knitting for Dollhouses by Rosemary Drysdale, Linda Macho. Copyright © 1981 Dover Publications, Inc.. Excerpted by permission of Dover Publications, Inc..
All rights reserved. No part of this excerpt may be reproduced or reprinted without permission in writing from the publisher.
Excerpts are provided by Dial-A-Book Inc. solely for the personal use of visitors to this web site.
Table of Contents
Contents
Title Page,Copyright Page,
Metric Conversion Chart - CONVERTING INCHES TO CENTIMETERS AND YARDS TO METERS,
Introduction,
How to Follow the Pattern Directions,
Crocheting for Dollhouses - How to Crochet,
Petal Tablecloth,
Lacy Tablecloth,
Granny's Kitchen Mat,
Oval Dining Room Rug,
Gingham Kitchen Set,
Bathroom Set,
Oval Rug,
Picot Rug,
Petal Doily,
Ecru Doilies,
Circular Pillow,
Bolster Pillows,
Rainbow Afghan,
Variegated Bedroom Set,
Granny Square Afghan,
Shell Bedspread,
Heirloom Bedspread,
Rose Bedspread,
Knitting for Dollhouses - How to Knit,
Welcome Mat,
Doll Rug,
Scatter Rug,
Table or Sideboard Runner,
Garter Stitch Rug and Pillow,
White Pillow,
Throw Pillows,
Floor Pillow,
Tie-Back Curtains,
Lace Curtain,
Short Lace Curtain,
Double Drapes,
Scallop Pattern Bedspread and Pillow,
Garter Stitch Afghan,
Aran Knit Afghan,
Lacy Bedspread and Pillow,
Floral Bedroom Set,
Canopy Bed Set,
Switchable Yarns,
Six Strand Floss,
Pearl Cotton,
Knit, Crochet, and Tatting Yarns,
Persian Yarns,
Baby and Fingering Yarns,