

Paperback(None)
-
SHIP THIS ITEMIn stock. Ships in 6-10 days.PICK UP IN STORE
Your local store may have stock of this item.
Available within 2 business hours
Related collections and offers
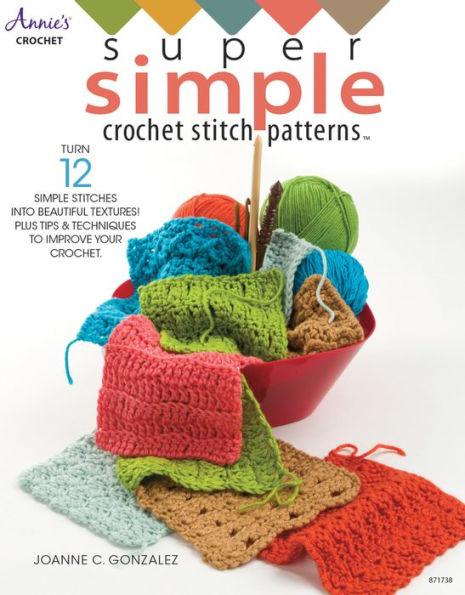
Overview

Product Details
| ISBN-13: | 9781590129265 |
|---|---|
| Publisher: | Annie's |
| Publication date: | 08/01/2018 |
| Edition description: | None |
| Pages: | 48 |
| Product dimensions: | 8.50(w) x 11.00(h) x 0.20(d) |
About the Author
Joanne Gonzalez was introduced to plastic canvas by coworkers several years ago. Joanne enjoys working with a versatile medium that holds its shape whether the project is flat or 3-dimensional. Joanne enjoys when family members are excited seeing what creations she's working on and even more when they receive her finished items. Joanne lives in Big Sandy with her husband and 1 son.
Read an Excerpt
CHAPTER 1
did you know?
Tips & Techniques to Improve Your Crochet
Gauge & Size
How to Get the Gauge
Gauge Swatch
Use this swatch to check against gauge used for sizing in this book.
Row 1: With size I/9/5.5mm hook and worsted-weight yarn, ch 11, sc in 2nd ch from hook, sc in each ch across. (10 sc)
Rows 2–10: Ch 1, sc in each st across.
This swatch measures 3½ inches × 3 inches.
Why Gauge Is Important
Having the same gauge as the instructions is important in getting the same size finished piece as the instructions are intended for. This is especially important for garment sizing and for yarn requirements. A garment will not fit the size intended if not crocheted in the gauge specified in the instructions. A project crocheted with a larger gauge will turn out larger than the size intended and will require more yarn to complete than the instructions call for.
The Stitch Patterns in this book are easily adapted if you're having trouble matching the gauge swatch.
If Your Swatch Is Larger
Try making the gauge swatch again with a smaller hook.
If you are still having trouble getting the gauge, then decrease the starting chain length per the instructions at the bottom of the Project Box (see General Information on page 5 for how to use the Project Box). Gauge is critical for sizing garments like the Slippers on page 18. To get the correct height of the piece, rows may need to be subtracted.
If Your Swatch Is Smaller
Try making the gauge swatch again with a larger hook.
If you are still having trouble getting the gauge, then increase the starting chain length per the instructions at the bottom of the Project Box. If needed, add rows to get the correct height measurement of the piece.
If Your Swatch Now Has the Right Gauge But Looks Like It Has Holes
This occurs when the tension on the yarn is very tight. The test swatch (below right) needed an N/13/9mm hook to get the width of the gauge swatch that used an I hook. Notice how it looks like there are holes between the single crochets.
For projects in this book, the finished size of the piece prior to assembly is important for sizing (not the number of stitches in the starting chain or number of rows used). Use the hook size needed to obtain gauge and work the Stitch Patterns as instructed with the starting chain and end row listed in the Project Box. Or use the hook size that is comfortable and adjust the length of the starting chain per the instructions at the bottom of the Project Box. Adjust the end row to get the needed measurements for the piece.
Experimenting With Size
Hook Size
Yarn manufacturers often put a recommended hook size on the yarn label. The worsted-weight yarn used in this book has a recommended hook size of I/9/5.5mm. In the Project Box included with each Stitch Pattern there is a column for hook and a column for yarn requirements. Not all projects that use worsted-weight yarn use an I hook. That is because different effects can be obtained with different sizes of hooks.
The three swatches below (made the same as the Gauge Swatch on page 6) use G, I and K hooks.
Using a smaller hook makes the stitching tighter, and more stitches will be needed to get the same measurements of a piece worked with a larger hook. Ripples (page 40), Posts (page 42) and Post X's (page 44) are stitched mostly with double crochets and thus have more "stretch" than the other Stitch Patterns. Using a smaller hook when making a large project like the Afghan or Lapghan will have the effect of tighter stitching for these Stitch Patterns. Using a larger hook makes the stitching looser, or more airy, and can be desirable in a project like the Cowl or to make an afghan "fluffier."
When experimenting with hook size, measure Row 1 to make sure it's the desired size. Work the number of rows needed to get the desired height for the piece.
Yarn Size
Worsted-weight yarn is a versatile yarn for many projects. Try experimenting with different thicknesses of yarn or with multiple strands of yarn or thread.
Using a thicker yarn or multiple strands and a larger hook will make a project work up faster (and thicker) since less stitches will be needed to get the Row 1 measurement and less rows will be needed to get the size of the piece. The Baby Blanket on page 16 is an example of using a bulky-weight yarn with a larger hook than the manufacturer recommends. The Slippers on page 18 use two strands of worsted-weight yarn held together as one to add thickness and durability.
When experimenting with yarn size, measure Row 1 and end row measurements to get the desired size of the piece.
When the Yarn Runs Out
End of the Skein/Color Change
Acrylic yarn is a favorite among crafters but if not secured adequately, ends may come loose and unravel the project. Here is a way to prevent that from happening.
Make a slip knot to be used as the last yarn over of the ending piece of yarn. Be sure that the side that slips is the side closest to the piece.
Adjust the position of the slip knot so that it ends up in between loops of yarn.
Make a slip knot to be used as the first yarn over of the new piece of yarn. Be sure the slip side is the side going to the skein of yarn.
Add the slip knot to the hook as a yarn over, allowing enough room between the hook and knot so that when the loop is pulled through the loops on hook, the knot will end up hidden in the stitching.
Lay ends over top of row and work over to hide. Several Stitch Patterns skip stitches in each row. See Hiding Ends on page 12 for another method to hide the ends.
Ripples (page 40) works in back loops. The end of the working yarn and the end of the new yarn are worked over as one when working into the back loops.
Skein Has a Knot
Cut out the knot. YES, do cut the knot out of the yarn. In the manufacturing process, when there is a break in the yarn, they will knot the ends together and continue spinning the skein. The knot may appear simply to be a loop in the yarn but when it comes undone it will unravel the piece.
Cut the knot out and work instructions as if the end of the skein has been reached.
Starting Chain
Working the starting chain can be the most challenging part of a project. Here is how to lay a good foundation for your project. Be sure to also read Consistency on page 10.
The first loop is made by making a slip knot. It needs to be secure for end and slip for yarn to be worked. This will keep the piece from unraveling if the slip knot becomes loose. Unless otherwise instructed, leave a minimum 2-inch end.
Loosely stitching the starting chain will make it easier to work the first row of stitching.
Know the parts of the chain.
Be able to count the number of chains from the hook.
Starting & Ending in the Correct Place
Why Stitch Count Is Important
Some projects are very easy to get off track and end up with the piece getting narrower or wider by accidentally subtracting or adding stitches. A common mistake, even for experienced crocheters, is to not start or end the row in the correct place. Checking the stitch count helps prevent this problem.
Row 2: Ch 1, sc in each st across.
For most patterns, a row that starts with a single crochet starts with a chain-1 before it that is not counted as a stitch but can easily be mistaken for one. The "ch 1" is just to bring the yarn up to "row height," otherwise the piece might gather. The first stitch to work is the last stitch worked on the previous row.
The last stitch to work of the current row was the first stitch of the previous row.
When working Row 2, the last stitch to work will look like this (if Row 1 was all single crochets).
When working Row 3 the last stitch to work will look like this (if Row 2 was all single crochets).
Row 2: Ch 3, dc in each st across.
For most patterns with rows that start with "Ch 3," the "ch 3" will count as a double crochet in the first stitch. When working the next row, the chain-3 will be the last stitch to work into. Be careful not to miss it.
The last stitch of the row to work is the top of the chain-3 that counts as a double crochet. When working Row 2, the last stitch to work will look like this (if Row 1 was all double crochets).
Consistency
Consistency
Working consistently in the chain is important so that the piece lies properly. It is especially important to work the chain consistently when the edge is going to be worked into later, like how the first and last rows of the Cowl will be joined, or like in adding a border to a blanket. Inconsistently working into the chain can cause the edge to twist and gather (see photos below), making the edge look messy and making it hard to tell where the bottom of each stitch is.
Worked in Both Loops
Most pattern instructions will assume that both front and back loops of the chain are being worked into (see Starting Chain on page 8). Joining will say something like, "At end of last row, with sl sts, join last row and remaining back bars of starting ch together" (see Cowl joining on page 17).
Starting Chain on page 8 illustrates working in both loops.
A completed row of single crochets will look like this with the back bar of the chain forming the bottom edge of the piece.
Worked in Back Loops
Consistency is key when working the starting chain. This is how to work in the back loops of the starting chain.
A completed row of single crochets worked into back loops will look like this. The front loop and back bar of the chain will form the bottom edge of the piece.
Worked in Back Bar
Working in the back bar of the starting chain gives the bottom edge the look of being the top edge. This technique is sometimes used in projects that will work the bottom of the chain as a part of the round.
To work the starting chain, turn the chain to see the back bars.
A completed row of single crochets will look like this with the front and back loops of the chain forming the bottom edge of the piece.
Coming Up Short
Missing a Chain?
Sometimes despite our best efforts the starting chain is not the correct length. Chains can be removed from a chain that's too long. Below is how to fix a chain that is too short without having to start over.
Sc row: Insert hook into last ch worked (A), yo, pull lp through st (B — this replaces the missing ch), yo, pull lp through 1 lp (C). To complete sc, yo, pull lp through 2 lps on hook (D). Repeat as needed (working into the lp marked B in the photo).
Dc row: Yo, insert hook into last ch worked (A), yo, pull lp through st (B — this replaces the missing ch), yo, pull lp through 1 lp (C). To complete dc (yo, pull lp through 2 lps on hook) twice (D). Repeat as needed (working into the lp marked B in the photo).
Row 1 Not Long Enough
First check and see where the error occurred. Did an extra stitch get skipped, did an extra stitch get worked (see Starting & Ending in the Correct Place on page 9) or is something wrong with the stitch count in Row 1 and it's just not long enough to complete Row 2? For some projects, especially intricate garments, it's best to start over, but for many projects, making a simple adjustment will suffice, like working 2 stitches in the last st, or skipping 1 stitch instead of 2. Be sure to check stitch count of Row 2.
Example: ... [(sc, dc, tr) in next st, skip 2 sts] across to last st, sc in last st.
Fasten Off
Patterns will end by saying something like, "Fasten off." Fastening off includes securing loose ends and trimming off excess. After finishing the last stitch, cut yarn about 5 inches from piece and pull completely through loop on hook, tightening it into a knot (but not so tight that it gathers the piece). Note: If the instructions say something like, "Fasten off leaving a 24-inch end/tail," then the end will have additional instructions to look for in the pattern. If the instructions do not immediately follow, then cut the end at indicated length and pull completely through the last loop on hook.
To secure the end, use the smallest size tapestry needle that the yarn will thread through. Using a smaller needle prevents the stitched piece from being stretched any more than necessary. Work back stitches through the piece being sure not to pull tight (so that the piece doesn't gather where it should not), but tight enough that end is not loose.
Start by inserting the needle into the stitching. Note that the needle is not going along either edge. This way the edges won't be "sealed" by the fastening and can still be worked in later, like for adding a border or joining.
Work a few back stitches by inserting needle where it will overlap some yarn in the piece AND go through the end just stitched in the piece. Piercing through the yarn end will help hold it in place and prevent it from coming loose.
Finish by stitching back through the stitches just made.
Cut remaining end.
Hiding Ends
Hiding the ends as the piece is worked is a simple way to conceal ends without having to weave them in when the project is done. As long as the slip knot is made properly (see Starting Chain on page 8), then ends in the piece can be worked over. For some pieces, it's as simple as laying the end over the top of the stitches and working over it.
The end (can also be called the tail) of the starting chain should be at least 2 inches long. This example uses a 2½-inch end because it needs to be worked into the stitching rather than laid across the top. The patterns in this book have skipped stitches in their design. Half Shells & Single Crochet (on page 28) is used to illustrate Hiding Ends. This technique can also be used for hiding ends in the middle of the piece like for When the Yarn Runs Out on page 7.
Half Shells & Single Crochet
Row 1: Ch 17, sc in 2nd ch from hook, sc each remaining ch across.
Row 2: Turn, ch 1, (sc, dc, tr) in first st, skip 2 sts, [(sc, dc, tr) in next st, skip 2 sts] across to last st, sc in last st.
The photos begin with the last stitch of Row 1. To make the last single crochet, hold the end and yarn together as one to make the last loop of the stitch.
Bring the end to the top of the st by pulling it through when making the "ch 1" at the start of Row 2.
Turn piece and lay end over tops of sts.
Work the first sc and dc of Row 2 in first st.
Notice the amount of end still to work over. It will be brought up inside the tr as it is made.
Skip 2 sts, lay end over next st and work (sc, dc, tr) into next st, hiding tip of end in the process. Gently pull stitching to undo gather. This will hide the remainder of the end if just a small part remains visible.
Joining Sides
Crocheting Edges Together
1. Lay the edges to be joined side by side. Match the tops and bottoms of the strips so that they lay out to the same length. Make sure the pieces are flat, not bulging and not stretched. Use scraps of yarn to loosely tie the pieces together so that the ties can be easily removed while joining, but not so loose that they come apart while working the joining. This is especially helpful for joining long strips that have different row heights, like the Sampler Afghan pictured below.
2. Beginning at one end of edges to be joined, single crochet edges together. Fasten off. Repeat until all Strips are joined.
Evenly Work Joining
Be sure to work evenly across so that piece lies flat.
When not enough stitches are used the joining will gather the edges together.
Edges to Be Joined
Joining sides: The Sampler Afghan shown on this page shows sides of the piece being joined with single crochets.
Joining first and last rows: Slippers on page 19 show first and last rows being joined with slip stitches.
Joining row and side: Poncho on page 22 shows row and side being joined.
Experiment with the joining using a contrasting color to see the difference when joining with single crochets versus slip stitches. Single crochets cover both edges being joined, but when joining with slip stitches, both edges are seen.
Join With a Double Crochet
Joining with a stitch is a nice technique for adding a border.
To join with a double crochet, hold the slip knot in place, yarn over, insert hook in stitch, yarn over, pull loop through stitch (first photo to right), complete as double crochet (2nd photo). This takes a little practice to get the tension right.
(Continues…)
Excerpted from "Super Simple Crochet Stitch Patterns"
by .
Copyright © 2018 Annie's.
Excerpted by permission of Annie's.
All rights reserved. No part of this excerpt may be reproduced or reprinted without permission in writing from the publisher.
Excerpts are provided by Dial-A-Book Inc. solely for the personal use of visitors to this web site.
Table of Contents
Pattern Services and Revisions,
STITCH PATTERNS,
Stitch Pattern Index,
Stitch Pattern Instructions,
GENERAL INFORMATION,
How to Use the Project Box,
DID YOU KNOW,
Gauge & Size,
When the Yarn Runs Out,
Starting Chain,
Starting & Ending in the Correct Place,
Consistency,
Coming Up Short,
Fasten Off,
Hiding Ends,
Joining Sides,
Join With a Double Crochet,
A Simple Border,
PROJECTS,
Sampler Afghan,
Afghan, Lapghan, Baby Blanket, Scarf,
Cowl,
Slippers,
Poncho & Hat,
Your Own Creation,
Metric Conversion Charts,
Stitch Guide,