Read an Excerpt
CHAPTER 1
a is for art supplies
A IS FOR ART SUPPLIES Danielle Donaldson Watercolor Illustration on watercolor paper 12" × 17" (30cm × 43cm)
A IS FOR ART SUPPLIES
We are surrounded by so much everyday inspiration. It's on our desks, on the shelves of our cupboards, outside our front doors and in our online world. Let's gather up some goodness, grab our supplies and imagine new ways to arrange everyday stuff and translate it into beautiful art.
In this chapter, you'll learn to downsize your drawings and nest them together to create well-balanced compositions full of color.
STUDY | a kaleidoscope of butterflies
STUDY | gather reference materials
Drawing an object is much more difficult if you rely on memory or imagination — especially if it's something new. Once I have decided on a new subject for my art, I do a little (or a lot) of research. This might include buying a new book, taking photos, creating an online inspiration board or looking up new artists. But don't get bogged down in this step of the process. Limit your time online for sure. And start practicing!
PREPARE | supplies
This list includes everything you need for all the exercises in this chapter.
5" × 7" (13cm × 18cm) Sketch or Bristol Paper Craft Dryer (optional)
PRACTICE | easy objects
If you don't want to illustrate butterflies in the first project, pick a simple object that is easy for you to draw and paint. This will help you focus on the nesting and overall composition rather than the objects in the illustration. Prior to painting, grab the item or print out a picture of the item to use as reference. Then, grab a pencil and paper.
Practice drawing the objects on a small scale. If it's hard for you to draw small, cut up the sketch/bristol paper into small pieces. This will force you to draw small.
STILL STUMPED?
Try one of these:
• paintbrushes
DEMONSTRATION
IMAGINE | a kaleidoscope of butterflies
Groups of nested objects are so much fun to draw and paint and are a great way to practice so many of the skills and techniques we've covered in the book so far. In this project, you'll use Repetitive and Nesting Practice (refer to page 18) to create a beautiful set of butterflies filled with color and imagination.
1 Mark Your Boundaries and Choose Your Inspiration
Using your ruler, make a small mark on each side, top and bottom of your 5" × 7" (13cm × 18cm) paper to create the boundary of the space where you'll draw your objects. This will protect your perimeters of white space while you work. Next, choose a piece of patterned paper and trim it to ¼" to ½" (6mm to 13mm) larger than your watercolor paper. Be sure to keep it close by as a reference throughout the project.
2 Choose Your Item and Draw
In this project, I have chosen butterflies because they are a fun and simple object to draw and paint. Draw your focus butterfly then draw more butterflies until your designated space is full. Be sure to vary the shapes, sizes and direction of the butterflies. When you are drawing mirror image objects, it may help to turn your paper upside down to draw the second wing. Use single lines and a light touch in case you need to erase and try again.
3 Add the First Washes of Paint
Start by painting each butterfly with a controlled wash. The wash should include the body and both wings. Try not to leave any white space between your wash and your pencil lines to avoid trapped white space.
Once you have painted two to three of the butterflies, gently drop the tiniest amount of the other colors you have mixed into different butterflies. For example, if your first butterflies are pink, green and blue, drop a smidge of blue and green into the pink butterfly. This is a way to tie the butterflies together — just like making mud! Continue to alternate between painting the first wash on a butterfly and adding bits of color to the butterflies that are still wet, until all the butterflies are painted. Feel free to sprinkle salt on the paint before the butterflies dry completely.
4 Add Details and Visual Tension
Let the watercolor dry or use a craft dryer (not a heat gun) to dry it. Then go over the piece with an eraser to get rid of the pencil guidelines. The paint can spread and go places you didn't plan for, so erasing lets you start over and clean up those lines based on the paint edges.
Add visual tension by going back in with the pencil and outlining the shapes, adding varied line weight as you go. Then add patterns and details to the shapes. Resist the urge to make tiny or realistic patterns. Tap into your imagination and play with scale. Try big polka dots or pretty scallops.
5 Add the Final Layers of Color
Using the paint that is already in your palette, glaze layers and add graded washes to small sections of the butterflies to add detail. I suggest sticking to similar colors for subsequent layers until you are more familiar with your palette. Sometimes the pattern added with pencil in Step 4 is enough. Not everything has to be painted!
6 Add Shadows
Mix the remaining paint on your palette to create your shadow color. If it isn't dark enough for the bodies of the butterflies, add a bit of Van Dyke Brown or Payne's Gray to the mixture. Paint the bodies of the butterflies with several layers until you are happy with them. Once your art has completely dried, add shadows to the wings where the bodies connect.
7 Add the Final Details
Use a white marker to add dots and final details to the butterflies. My favorite marker for this is the Uni Posca 1mm white paint marker.
DEMONSTRATION
IMAGINE | mason jars
If you love mason jars as much as I do, you'll love this project. Painting glass with watercolor can be tricky, so be sure to keep a jar in front of you for reference. Keep in mind you already have the highlights done — just preserve the white paper while painting.
1 Practice Drawing Jars
Measure out a rectangle and draw a dotted line. This is your guideline shape for the front of the glass jar. Complete the box using one-point perspective (as shown in C is for Chairs and Couches onpage 52). Notice how narrow the rectangle is? It must be this narrow for the ellipses to curve at the correct angle.
2 Draw the Jar
Mark the halfway points on all four sides on the top and bottom rectangles. Use these points to create your curves. Use your guidelines to create the sides of your cylindrical jar shape. At the top of the jar, add threads indicating where the lid would be screwed on. Last, draw a thin line around the sides and bottom to indicate the thickness of the glass. If the back of the jar on the bottom has a dark line, erase most of it to lighten it.
3 Add Layers of Color and Fine Details
Add layers of color to the jar to give it dimension and the glass-like appearance. This example uses a combination of controlled, wet, graded and transition washes along with hard-and-soft edge glazing. Follow the example and try to replicate it. Copying is the best way to learn
Once dry, add visual tension in pencil and highlights with a white marker pen.
Using the instructions from the Kaleidoscope of Butterflies project and your mason jar practice, try creating a nested illustration of mason jars.
B IS FOR BLUE Danielle Donaldson Watercolor Illustration on watercolor paper 12" × 17" (30cm × 43cm)
CHAPTER 2
c is for chairs and couches
C IS FOR CHAIRS AND COUCHES Danielle Donaldson Watercolor Illustration on watercolor paper 12" × 17" (30cm × 43cm)
C IS FOR CHAIRS AND COUCHES
The best class I ever took was my perspective drawing class. Held at a local junior college, we met twice a week, three hours each, for five months. I wish I could remember my delightful instructor's name so I could thank him properly for single-handedly shifting my art in such a profound way. It was the hardest art class I ever took, and I despised most of it — almost every minute of it. It involved logic and math and superstraight lines and a plethora of patience.
In this chapter, you'll discover that everything you see can be broken down into boxes — everything. Some of those boxes may turn into spheres or cones, but a box is where it starts. This chapter will give you a little taste of perspective drawing. It's a concept that requires a ton of patience and fortitude to understand. But if you want to grow as an artist, it is a must!
STUDY | freehand polka-dot chair
STUDY | one-point perspective defined
ONE-POINT PERSPECTIVE — A drawing has one-point perspective when it contains only one vanishing point on the horizon line. This type of perspective is typically used for images of roads, railway tracks, hallways or buildings viewed so that the front is directly facing the viewer. These parallel lines converge at the vanishing point.
VANISHING POINT — In graphical perspective, a vanishing point is a point in the picture plane that is the intersection of the projections (or drawings) of a set of parallel lines in space onto the picture plane.
HORIZON LINE — The terms "horizon line" and "eye level" are often used synonymously. Horizon line/eye level refers to a physical/visual boundary where sky separates from land or water. It is the actual height of the viewer's eyes when looking at an object, interior scene or an exterior scene.
VANISHING LINES — Any of the lines converging to a vanishing point in a pictorial perspective is a vanishing line.
PREPARE | supplies
This list includes everything you need for all the projects in this chapter.
Craft Dryer (optional)
DEMONSTRATION
PRACTICE | draw a one-point perspective box
It all starts with a dot, a line and a box. I drew this exercise on blank paper. If straight lines are a challenge for you, invest in a pad of grid paper. The grid allows you much more space and guidance to draw several boxes on one page.
1 Draw the Front of the Box
On sketch, bristol or grid paper, draw your horizon line, and mark the center point. Then draw a box below the horizon line. That's the front of your three-dimensional object. Fill it in with a light wash of orange.
2 Draw Vanishing Lines
Draw dashed vanishing lines from the corners of the box to the point on your horizon line. Trace the dashes with a light line of green watercolor.
3 Complete the Top of the Box
Draw a solid horizontal line connecting the top two vanishing lines to create the top of the box. Fill that space in with a light wash of yellow.
4 Complete the Sides, Back and Bottom of the Box
Using the line drawn in Step 3, draw a vertical solid line from the left endpoint until it intersects with the lower left dashed vanishing line. Repeat on the right endpoint to create the back of the box. Draw a horizontal line using the two vertical lines' intersection points to complete the bottom of the back of the box. Go over the dashed vanishing points with a solid pencil line to connect the front of the box to the back.
Add a light red wash to the left side of the box, a light violet wash to the right side, a gray wash to the back and a glaze of gray over the bottom.
DEMONSTRATION
PRACTICE | draw a one-point perspective chair
Let's take it up a notch! Take time to review my drawing in each step. Be sure you can see all the boxes as they are taking shape. Trace them with your finger or pencil, label them with numbers — anything to help your eyes focus and see the chair in pieces and as a whole.
1 Draw the Boxes
Using the steps from the one-point perspective practice, lightly draw the horizon line and vanishing point. Next, draw a rectangular box as shown; this will be the seat and base of the chair. Now draw a thin box on top of the base; this will be the back of the chair.
2 Draw the Chair
Draw the parts of the chair in the order mapped out below. While drawing each component, notice how they become a box within a box.
First, draw the front of the seat and legs. Second, draw the front of the chair back. Third, draw the sides of the legs and seat back. Feel free to add additional vanishing lines if you need them. Be sure to double-check all of your lines against the vanishing lines and vanishing point.
3 Add Layers of Color and Visual Tension
Premix a yellow-green, warm blue and cool green in separate wells of your mixing palette. Begin with a transitional wash over the entire chair (from top to bottom, cool green, warm blue, then cool green). While the paint is wet, mix yellow-green into the top and front of the seat and the front two legs. Keep dropping in bits of paint+water from different wells of your mixing palette to unify the wash. Once dry, add soft-edged glazes of color to further define the parts of the chair. As you add these layers, make color choices based on warm colors advancing and cool colors receding.
Once dry, erase any remaining pencil lines that are no longer needed.
DEMONSTRATION
IMAGINE | freehand polka-dot chair
Chairs and couches offer a balance of structure and softness — and are a go-to object for me to illustrate. This chair looks a bit wonky but so comfy. Not ready to draw freehand? Feel free to use a ruler and guides.
1 Start Drawing the Chair
Mark your white space on all sides to be sure your chair isn't too big. Then draw the back of the chair and the arms as shown.
2 Draw the Rest of the Chair
Add the legs. Notice that the back legs can barely be seen. Next, add the cushion and carefully erase any of the arm lines that overlap into the cushion and are no longer needed. Draw the base underneath the cushion and arms. Last, add depth to the back of the chair and erase your white space marks.
3 Add the First Layer of Color
Premix a warm blue, cool blue and warm olive green in separate wells of your mixing palette. Using a transitional wash, start at the back of the chair with a cooler blue and blend to a warmer blue on the front of the chair. Drop in a warm green on the front of the chair while the wash is still wet. Sprinkle a smidge of salt and let dry.
4 Add Visual Tension
Once dry, gently brush off the salt. Add visual tension, large polka dots and detail work with your pencil as shown.
5 Add More Color
Add a second glaze using a warm blue (mine is a cool blue with Burnt Sienna mixed in, to warm it up) on the front of the arms and front of the seat cushion, front legs and the base of the chair. Next, paint a cooler blue (more cool blue, less Burnt Sienna) on the top of the arms and the seat cushion. Last, paint a cool blue on the back of the chair around the polka dots.
Add a soft-edged glaze with the cool blue to the back section of the arms, back of the seat and the back legs. Continue glazing additional layers with soft and hard edges to define the chair even more. Remember to let washes dry completely before adding layers. Notice that I left small areas of the first wash showing through for visual interest and depth.
6 Add Shadows
In my example, I felt like the back of the chair was moving forward. To fix this, I added a layer of warm accent colors mixed with a bit of the original blue (Quinacridone Burnt Scarlet, Quinacridone Burnt Orange and a touch of Olive Green). Mix the remaining paint together on your palette to create a shadow color. While the layer is wet, drop the shadow color on some edges to get depth. If you want to give it even more depth, drop in a bit of Van Dyke Brown on the edges of your still-wet shadow glaze, as shown, to increase the depth.
7 Add Final Details
Once the paint is completely dry, use a fine-tip white ink marker to add final highlights, pattern and texture. If you like, sew coordinating pieces of patterned paper together, then trim the edges so it's slightly larger than your finished piece. Finish by sewing the finished art onto sewn and trimmed paper.
(Continues…)
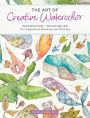
Excerpted from "The Art of Creative Watercolors"
by .
Copyright © 2018 Danielle Donaldson.
Excerpted by permission of F+W Media, Inc..
All rights reserved. No part of this excerpt may be reproduced or reprinted without permission in writing from the publisher.
Excerpts are provided by Dial-A-Book Inc. solely for the personal use of visitors to this web site.