
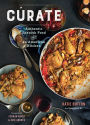

Cúrate: Authentic Spanish Food from an American Kitchen
320
Cúrate: Authentic Spanish Food from an American Kitchen
320eBook
Available on Compatible NOOK devices, the free NOOK App and in My Digital Library.
Related collections and offers
Overview
The vibrant flavors of Spain brought into the American home kitchen by a young lauded chef and founder of one of America's most acclaimed new restaurants
Katie Button debuts her first cookbook ever as a peek inside the kitchen of her award-winning restaurant, Cúrate. This cookbook features 125 recipes celebrating the vibrant flavors and broad appeal of Spanish food. Button brings the cuisine at Cúrate into the kitchen of every home cook, showing readers how to re-create classic Spanish dishes and adapt them using American seasonal ingredients.
From cherished traditions (Tortilla Española; Chicken Paella) to mouthwatering new favorites (Ham and Cheese Stuffed Fried Pork Chops; Ribeye Steak with Blue Cheese Sauce) to celebratory drinks and desserts (The Perfect Gin and Tonic; Almond Cake with Cream Sherry and Brandy), Cúrate brings Spain to you.

Product Details
| ISBN-13: | 9781250059451 |
|---|---|
| Publisher: | Flatiron Books |
| Publication date: | 10/11/2016 |
| Sold by: | Macmillan |
| Format: | eBook |
| Pages: | 320 |
| File size: | 135 MB |
| Note: | This product may take a few minutes to download. |
About the Author
Genevieve Ko is an author (Better Baking), food writer, recipe developer, and culinary consultant who creates and collaborates on cookbooks, magazine and digital stories, and epicurean corporate branding. She has worked with famous chefs including Jean-Georges Vongerichten, Sarabeth Levine, George Mendes, Kenny Lao, and Carla Hall.
Read an Excerpt
Cúrate
Authentic Spanish Food FROM an American Kitchen
By Katie Button Genevieve Ko, Evan Sung
Flatiron Books
Copyright © 2016 Katie Button with Genevieve KoAll rights reserved.
ISBN: 978-1-250-05945-1
CHAPTER 1
STARTERS
TOMATO BREAD SPANISH POTATO, ONION, AND EGG TORTILLA COCKTAIL SKEWERS CROQUETTES CREAMY SALT COD AND POTATO SPREAD
Pan con Tomate
TOMATO BREAD
* * *
In Catalonia, every Spanish meal starts with pan con tomate: toast with olive oil, garlic, and, of course, tomato. It can be eaten alone with a glass of wine or served as part of an appetizer board that includes charcuterie, anchovies, and cheese.
THE TRADITIONAL WAY TO MAKE IT IS SIMPLE. All you have to do is set out toasted split ciabattas or baguettes, halved ripe tomatoes, halved peeled garlic cloves, good extra-virgin olive oil, and salt (a nice, flaky one such as Maldon or fleur de sel, if you have it). Instruct your guests to lightly rub the cut sides of the garlic on the bread (be careful, you can overdo it), then rub and squeeze the cut sides of the tomatoes on the toasted bread hard enough to get a coating of the seeds, juice, and pulp. Drizzle with the oil, sprinkle with salt, and eat! A few people can make it for the whole table or each person can put together her own. The key is to eat it as soon as it's done so the bread stays crisp and the tomatoes juicy.
If you're cooking for a group of eight or more people, this technique can be kind of a pain. A good dinner party trick is the one we use in the restaurant. Make a batch of the Grated Fresh Tomatoes (here) the night before. When you're ready to serve, preheat the broiler to high. Slice a large ciabatta loaf in half, splitting it as you would if you were turning it into a sandwich. Place it cut sides up on a half-sheet pan and broil until well-toasted. Flip over and toast the crust sides as well. Flip again and transfer to a cutting board. Immediately spoon the tomato mixture on top, spreading to the very edges of the loaf. Drizzle with olive oil and sprinkle with salt. Cut into pieces and serve.
If you happen to be grilling, you definitely should grill the bread instead of broiling. Pan con tomate goes great with grilled foods or as the accompaniment to any dish. You can even use it as the base for sandwiches (here). You can't mess up this recipe. The only thing you can do to make it even better is to use the best ingredients you can find.
El Matrimonio
TOMATO BREAD WITH ANCHOVIES
DRAPE HIGH-QUALITY ANCHOVIES PACKED IN OLIVE oil and boquerónes (white anchovies marinated in vinegar) over the pan con tomate.
Tortilla Española
SPANISH POTATO, ONION, AND EGG TORTILLA
* * *
MAKES ONE 10-INCH TORTILLA; SERVES 4 AS A MAIN DISH OR 6 TO 8 AS A SMALL PLATE
Tortilla may be Spain's most iconic dish and it's found all over the country. It looks like a frittata, but develops a unique richness with oil-cooked potatoes and onion. The potatoes become tender through a process that hovers somewhere between frying and poaching. Some will turn color, some not, but that's fine as long as they become tender. The onions cook in the same oil and then both go piping hot into the eggs before cooking all together like a giant, thick pancake.
The amount of oil may seem excessive, but it's crucial. The reality is that most of it doesn't get absorbed, but the quantity below is needed to keep the potatoes submerged. You can strain any oil that's left over — it's delicious — and use it to cook anything else. I pour mine into a glass jar with a lid and keep using it until it's gone.
All this may sound intimidating, but tortilla is really forgiving. As long as it browns well on the first side that hits the pan, it's okay if it goes back in ugly after flipping. You can shove it into place and shape it by tucking in the edges with a spatula. As for the flipping itself, choose a board or plate that's a little bigger than the skillet and easy for you to handle. Plates with a lip or rim are even better because they'll keep the egg juices and oil from running out.
Tortilla tastes best at room temperature, making it the ideal do-ahead appetizer. It looks impressive plated whole then sliced to serve and playful when cut in squares and speared with cocktail picks. That's how you'll find it in tapas bars in Spain. Enjoy bites with sips of Oloroso sherry for a magical flavor pairing.
10 large eggs
1 cup blended oil
1½ pounds medium Yukon gold potatoes (about 4), peeled and cut into 1/16-
inch slices, divided
Kosher salt
1 large yellow onion, cut into 1/16-inch slices
WHISK THE EGGS IN A LARGE BOWL UNTIL THE yolks and whites are incorporated. Heat the oil in a 10-inch-round, 2-inch-deep well-seasoned cast-iron or nonstick skillet over high heat. When the oil is hot, add half of the potatoes. Flip the potatoes on the bottom to prevent them from browning. Reduce the heat to medium and cover with a lid. Cook until a thin-bladed knife slides through the potatoes easily, 5 to 6 minutes. Use a slotted spoon to transfer the potatoes to the eggs, and stir in 1½ teaspoons salt. Repeat with the remaining potatoes, adding another 1½ teaspoons salt to the eggs when you add the second potato batch.
Pour off all but 2 tablespoons of the oil and reserve. While the oil remaining in the skillet is still hot, add the onion and 1 teaspoon salt. Cook, uncovered and stirring frequently, until the onion is extremely soft, 10 to 15 minutes. If it seems like it may burn, lower the heat. Transfer to the bowl with the eggs and potatoes. Stir until everything is well combined.
Return 2 tablespoons reserved oil to the skillet and reduce the heat to medium-low. Add the egg mixture and spread in an even layer. Cook until the underside is nice and golden, about 10 minutes. If the bottom starts to brown too much before the center starts to set, lower the heat. If the bottom isn't turning golden even as the egg sets, raise the heat for a minute or two to get some color. Remove from the heat.
Loosen the sides of the egg mixture from the skillet by sliding a silicone spatula between the set egg and edge of the pan. You're going to flip the tortilla now. Put on oven mitts and center a large cutting board or flat plate over the pan. Grab the sides of the pan and the cutting board together and flip them, then set them down on the counter. Lift off the pan and put it back on the burner. Carefully slide the tortilla back into the skillet with the pretty golden brown side facing up. Turn the heat to medium.
Run a silicone spatula around the edge of the tortilla, tucking in the edge and rounding it, so it looks pretty again. Cook until the underside is golden, 5 to 6 minutes, adjusting the heat as needed. The timing is going to vary. You can press it with your finger to test for doneness; it should have some give on top and not be super squishy. I never get the same tortillas at home every time. Sometimes I'll hit that perfect runny moment, when the outside is set, but the very center stays wet. Other times, it will be set all the way though. It's delicious either way.
Carefully slide the tortilla out of the pan onto a serving dish. Cool for 1 hour at room temperature. Tortilla Española is best served at room temperature.
Banderillas
COCKTAIL SKEWERS
* * *
The term banderillas refers to the sticks used in bull fights, but also translates to "little flags" in Spanish and, more importantly, skewers served with drinks. They're basically the little snacks you'd serve at a cocktail party for a group of friends. The idea is that you're pairing different ingredients into an interesting one-bite combination.
When spearing the ingredients, start with items that might slide off, such as boquerónes, then end with something that will hold at the bottom of the skewer, such as an olive, cornichon, or chunk of Manchego. I don't often put more than three items and usually use only two or even just do a stuffed olive. Think about what people can fit in their mouths.
Though the basis of banderillas is high-quality canned and jarred ingredients, I like to throw in homemade okra pickles. They're so easy and can be done far in advance, and take the tastes to another level. Even if you skip the okra, you can get wonderful results if you follow my formula below, which also works well with green beans and any other vegetables.
You can also make it fun for guests by setting up a DIY banderilla station: Throw a bunch of skewers down with a bunch of ingredients and let your guests try to create the best combo. They get to discover flavors and compare their creations with others (and make it so there's less work for you to do).
What ties these bites together is something bright and refreshing to sip. The Jerez Sour would be really good, as would any Fino or Manzanilla sherry.
PICKLED OKRA
MAKES 2 PINT JARS
9 ounces okra (about 15 small pods)
1/3 cup thinly sliced sweet onion
4 dill sprigs
2 small garlic cloves, peeled
½ cup apple cider vinegar
1/3 cup sugar
¼ teaspoon kosher salt
2 teaspoons coriander seeds
1 teaspoon yellow mustard seeds
1 teaspoon dill seeds
1 teaspoon black peppercorns
½ teaspoon crushed red chile
DIVIDE THE OKRA, ONION, DILL, AND GARLIC among 2 pint jars or containers, packing them in tightly. Heat the vinegar, sugar, salt, and ½ cup water in a small saucepan over medium heat, stirring to dissolve the sugar and salt. Add the coriander seeds, mustard seeds, dill seeds, peppercorns, and chile. Bring to a boil, then divide among the jars.
Cover the jars tightly and cool to room temperature. Refrigerate for at least 1 day or up to 1 week.
STORE-BOUGHT BANDERILLA ESSENTIALS:
anchovies
boquerones
olives
piquillos or roasted peppers
pickled guindilla peppers
blue cheese
hard Spanish cheeses, such as Manchego, Mahón, Cordobés, Idiazábal
cornichon
cocktail onions
BANDERILLA PAIRING PHILOSOPHY:
There isn't a bad combo of stuff. I wouldn't necessarily do blue cheese and Manchego, but I'd put either of those cheeses with anything else. Fatty cheese calms the acidity of olives and pickles. There's no wrong way to go with the ingredients above. Even a boquerón and anchovy, two preparations of the same ingredient, can be paired. In fact, it's called el matrimonio, which means "marriage." That's how well they work together.
NATURAL PAIRINGS:
olives stuffed with blue cheese (even better wrapped with an anchovy)
olives stuffed with piquillo (even better wrapped with a boqueróne)
anchovies and piquillos
pickled okra and Manchego
guindilla peppers with olives (even better stuffed with blue cheese)
Croquetas
CROQUETTES
* * *
MAKES ABOUT 4 DOZEN
Croquetas, a common dish all over Spain, are served hot or room temperature for lunch and dinner or as an appetizer or tapa. Everyone makes them at home and keeps a stash in the cooler. The fillings often come from leftovers ranging from chicken to salt cod. There are a few steps to croquetas, but they can be prepared in stages. And once they're rolled and coated, they can be frozen then fried any time for a 10-minute meal or appetizer. They're best eaten with cold beer; a lager or pilsner would be great.
HAM CROQUETTES
4 tablespoons unsalted butter
½ cup very finely chopped onion
1/3 cup all-purpose flour
1½ cups whole milk
¼ cup heavy cream
8 ounces very thinly sliced Serrano ham, torn into small shreds
MAKE THE BÉCHAMEL: Melt the butter in a large saucepan over low heat. Add the onion and cook, stirring occasionally, until translucent and soft but not at all browned, about 15 minutes. Add the flour and cook, whisking continuously, just until the raw flour smell dissipates, about 1 minute. Continue whisking while adding the milk a little at a time to prevent the mixture from clumping. Whisk in the cream. Bring to a boil over medium heat, then boil for 2 to 3 minutes, whisking the whole time.
Add the ham and stir for 2 minutes to draw out some of the moisture. Spread the mixture on a half-sheet pan and refrigerate, uncovered, until cold. Shape and fry the croquettes according to the instructions here.
CHICKEN CROQUETTES
4 tablespoons unsalted butter
½ cup very finely chopped onion
1/3 cup all-purpose flour
1½ cups whole milk
¼ cup heavy cream
2½ cups finely shredded skinless, boneless Roasted Chicken (here)
or store-bought rotisserie chicken
2 teaspoons kosher salt
½ teaspoon freshly grated nutmeg
1/4 teaspoon freshly ground white or black pepper
MAKE THE BÉCHAMEL: Melt the butter in a large saucepan over low heat. Add the onion and cook, stirring occasionally, until translucent and soft but not at all browned, about 15 minutes. Add the flour and cook, whisking continuously, just until the raw flour smell dissipates, about 1 minute. Continue whisking while adding the milk a little at a time to prevent the mixture from clumping. Whisk in the cream. Bring to a boil over medium heat, then boil for 2 to 3 minutes, whisking the whole time.
Add the chicken, salt, nutmeg, and pepper and stir for 2 minutes to draw out some of the moisture. Spread the mixture on a half-sheet pan and refrigerate, uncovered, until cold. Shape and fry the croquettes according to the instructions here.
MUSHROOM CROQUETTES
2 pounds cremini mushrooms
¼ cup extra-virgin olive oil
¼ ounce dried porcinis (1/3 cup)
¾ cup whole milk
4 tablespoons unsalted butter
½ cup very finely chopped onion
1/3 cup all-purpose flour
1 teaspoon fresh thyme leaves
¼ cup heavy cream
½ teaspoon kosher salt
ROAST MUSHROOMS AND MAKE MUSHROOM stock: Preheat the oven to 350°F. Pulse the cremini mushrooms in a food processor, working with 1 pound at a time, until very finely chopped. Toss with the oil on a half- sheet pan and spread in an even layer. Roast until browned and dry, stirring once halfway through, about 45 minutes. Cool completely.
Meanwhile, bring the dried porcinis and 1 cup water to a boil in a small saucepan. Remove from the heat, cover, and let stand for 15 minutes. Drain through a fine-mesh sieve, pressing on the solids to extract as much liquid as possible; discard the solids. You should have ¾ cup stock. Stir the milk into the stock.
To make the béchamel, melt the butter in a large saucepan over low heat. Add the onion and cook, stirring occasionally, until translucent and soft but not at all browned, about 15 minutes. Add the flour and thyme and cook, whisking continuously, just until the raw flour smell dissipates, about 1 minute. Continue whisking while adding the stock-milk mixture a little at a time to prevent the mixture from clumping. Whisk in the cream. Bring to a boil over medium heat, then boil for 2 to 3 minutes, whisking the whole time.
Add the roasted mushrooms and salt and stir for 4 minutes to draw out some of the moisture. Spread the mixture on a half-sheet pan and refrigerate, uncovered, until cold. Shape and fry the croquettes according to the instructions (see sidebar on this page).
HOW TO SHAPE AND FRY CROQUETTES
1 cup panko (Japanese bread crumbs)
1 large egg
1/3 cup all-purpose flour
Canola oil, for frying
Roll 1 heaping tablespoon of the croqueta mixture into a football shape. It should be about 2 inches long and 1 inch in diameter at its thickest point. Repeat with the remaining mixture. If the mixture has softened in the process, refrigerate until firm.
Process the panko in food processor into fine crumbs, then transfer to a shallow dish. Beat the egg with 1 tablespoon water in another shallow dish and place the flour in a third dish.
Working with 4 or 5 pieces at a time, coat in flour and shake off excess, then coat with egg and let excess drip off. Finally, dredge in the panko to completely cover. Transfer to a wax-paper-lined half-sheet pan. At this point, you can cover and refrigerate for up to 3 days or freeze the coated croquettes. When frozen rock hard, transfer to airtight containers and freeze for up to 1 month.
When ready to cook, fill a cast-iron skillet with canola oil to a depth of ½ inch. Heat over high heat until you see ripples forming on the surface. Drop in one croquette to test the oil temperature. If it does not begin to sizzle immediately, then remove the croquette right away and wait until the oil gets hot enough. Add just enough croquette to fit in a single layer without crowding and reduce the heat to medium. Fry, using a fork or spoon to carefully turn the croquettes to brown on all sides, until golden brown, 3 to 5 minutes. Transfer to a paper towel–lined plate to drain. Repeat with the remaining croquettes.
Cool for at least 5 minutes before serving. You don't want to burn your tongue, and the croquettes taste great when completely cooled, too. Serve them hot, warm, or at room temperature.
(Continues...)
Excerpted from Cúrate by Katie Button Genevieve Ko, Evan Sung. Copyright © 2016 Katie Button with Genevieve Ko. Excerpted by permission of Flatiron Books.
All rights reserved. No part of this excerpt may be reproduced or reprinted without permission in writing from the publisher.
Excerpts are provided by Dial-A-Book Inc. solely for the personal use of visitors to this web site.
Table of Contents
Contents
Title Page,Copyright Notice,
Dedication,
FOREWORDS,
INTRODUCTION,
PANTRY,
GEAR,
STARTERS,
SOUPS AND SALADS,
SEAFOOD,
MEAT AND POULTRY,
VEGETABLES,
NOODLES, RICE, AND BEANS,
BRUNCH AND LUNCH,
DESSERTS,
DRINKS,
ACKNOWLEDGMENTS,
INDEX,
About the Author,
Copyright,
Related Subjects
Customer Reviews
Explore More Items


